Showing posts with label pouch. Show all posts

Wednesday, 13 October 2021

2021 Week 41 Semi Circular Pouch

 I think I've cracked it!

Use a suitably sized plate to mark a circle and cut out of fabric, (fussy cut if desired or appropriate)

Cut circle in half and add a piece between the two halves to add about 50% to the size.  Cut fusible wadding and lining to the same size, assemble together as a sandwich and quilt as preferred


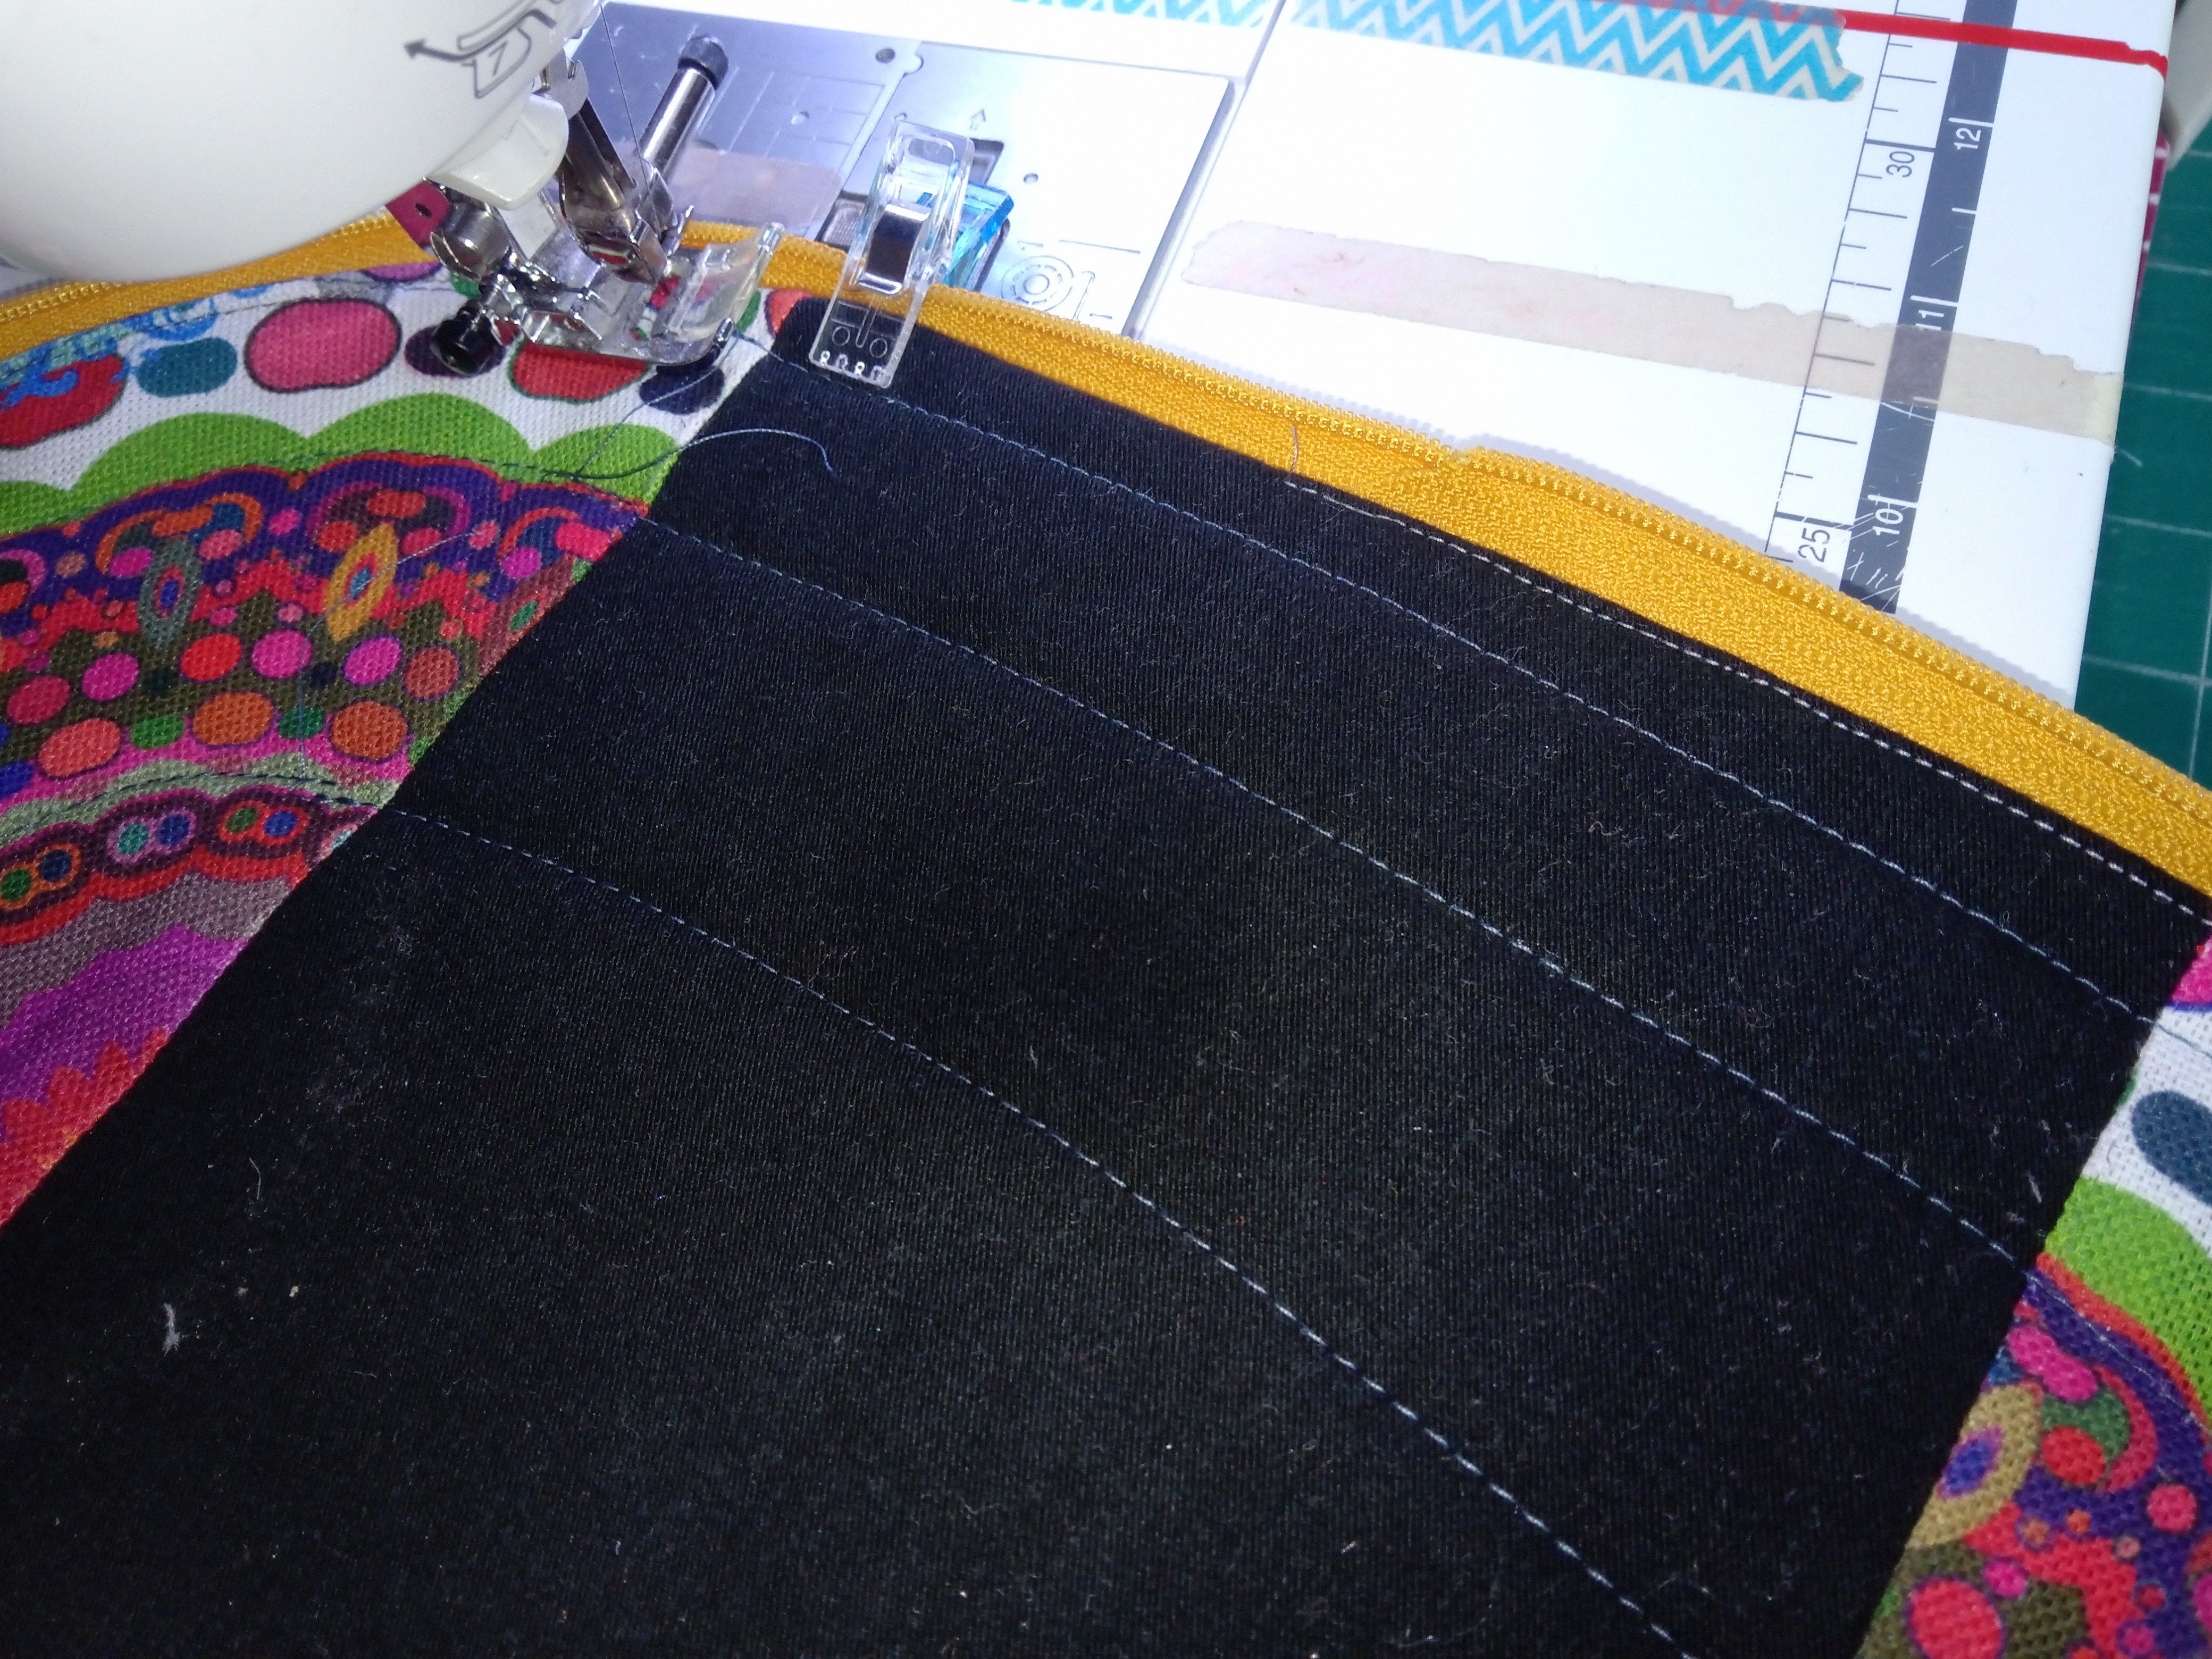
Use a zip at least as long at half the perimeter: trim the ends off in a deep V shape, sperate the two sets of teeth, and pin one set RST to cover half the extension and the curve.,  Repeat with other teeth and other half of pouch.  Stitch 


Stitch bias binding over the raw edges.  I used 1/2" (that finishes at 1/4" when folded) and zigzagged it over the raw edges and the zip tape

Turn the zip tape and bias binding into the bag, pin and topstitch.


Add the zipper pull so it can be used and is even (see this page for more detailed instructions), and zip 90% closed.


Cut 1.5 inch square from the corners of the bag (making sure the pull is on the remaining bit of the zip

Clip or pin the zipper ends so the pull cant escape, and then turn inside out


Wide mouth frog bit (a favourite book when the girls were little)

Gently push the folded bit and the zipped bit together


until they meet in a straight line

Now sew along this line to close the bag, and also (if required) cover with bias binding

Turn the pouch the right way out and admire!!!


Saturday, 29 May 2021

2021 Week 21

 I've seen pics of two gorgeous munchkins on their I-spy quilts this week - my favourite pics!  Thanks to the grandmas for sending them to me!


I started a mini EPP round the world rainbow  patchwork, inspired by Plum who has enough minis that she has created a gallery!!!  Do go an have a look: https://plumquilts.blogspot.com/2021/05/mini-gallery-opening-or-how-to-spend.html


I stitched a bridge and groom pair of Gingers for a couple getting married at church

And I went to help empty a lady's craft room - oh my gosh soooooo many planned projects - this is just (some of) the wool - she also stitched, did paper crafts, bead crafts, wire crafts and so many others - this has made me think about how much stuff I have and who will empty it out when I go (Plum and Jackie the girls say they are calling you and walking away LOL)
And this is some of the embroidery kits, other kits, sizzix dies, painting stuff and rubber stamps she had.  There are some needle punch tools priced 2 and 6!!!!! 

She had two or three identical (unopened) packs of some of the wire craft gadgets and tools

As a break from the sorting I did some sewing - I wanted a small handbag just to carry my phone so I made this

It was only when I went to use it that I realised the zip was inside out so it will be re-designed!

I've now had my second jab and the sun has been shining and is predicted to carry on for a few days yet  - got to count the positives!


Saturday, 14 November 2020

2020 Wk 46 - What shall I show you today?

 Maybe you have forgotten that I sew Gingers?  Someone asked me the other day if I had counted them - maybe I should have done - but I'm not even due I'm prepared to count how many times I have ordered more 'ginger' felt as I'd run out!  So the latest have been some Yule Nissen (in Norwegian), aka Tomte (Swedish) and gnomes.  They are actually gingers under their boots and gloves and clothes and beards! 


I also stitched a ginger Nativity set.  This one isn't my design, I bought it from Memories in Thread.  I'm not convinced about some on the animals - the big sheet is HUGE and the camel looks lire like a lama, but the rest is quite cute.  Someone suggested stitching a stable (with some small buttons) and adding one character a day as an advent calendar - it might have to start in the middle of December rather than the first!!! (there is one more wise man who missed the photo shoot, and I guess a star, and the moon, and some more shepherds and farm animals could bulk it out - maybe a project for next year?)


My girls are (thankfully) too old for the Elf on the Shelf project but I have friends who prepare some brilliant escapades for their elves: I mentioned that M-I-T  has designed some costumes for elves and got talked into making this!!!!

Another friend sent me a link to a design like this on Pinterest.  It was fun to design and stitch but I'm not really sure what to do with it next . . .  so it's gone to her in the post  and can be here problem now!!


The triangle EPP quilt is growing: I'm not sure how big it will get: I'm sure it will tell me when it's big enough or I will tell it there are no more triangles!!!


But for now I still have plenty of tacked triangles and ready-to-be-tacked triangles to add

I haven't bought much fabric (felt doesn't count does it?)

But Jackie sent me a pic of this zippy pouch she's made, (and has promised to teach me when we can meet up) 


and about ten minutes later I saw this fabric for sale, so I kind of HAD to buy some as I think it will be perfect for the pouches!

Well I've actually had some orders for some Yule Nissen gingers so I'm going to go and do some "work"!  Have great weekend

Sunday, 22 March 2020

2020 Wk 12 - Zip zip zippy day

we were not able to hold Crafty Church yesterday, but I did go and open the church for a time of prayer and reflection, and so I could use the doors/tables to plan a customer's quilt.

All planned now so I can start sewing

I may have done some shopping!    I do have a weakness for pre-wound bobbins and was delighted when I found a UK based site selling them.  Not only much cheaper on postage, but the USA site had pages and pages of machine manufacturers and which bobbin size . . . but my machines weren't on the list.  At www.embroideredjust4u.co.uk, she just listed 4 choices for Brother - nice and easy!

So I treated Lizzie to black bobbins and some pretty colours, and the sewing machine (which doesn't have a name) to a whole load of colours!

Two of the classes that have had to be postponed were for a zippy pouch - one was a machine class and one was hand sewing, but both needed samples, and my hand sewing ladies don't mind if I machine sew a sample for 'their' class.

My problem is that I wont remember the construction methods when I don't to teach these so I am saving my sanity by recording the methods along with the photos here!

The instructions are very "short hand", but if you do want more info just zap me a comment or email

Curt a piece of vinyl into a square or rectangle about 1/2 inch bigger than the size you want the pouch.  Cut the vinyl into 2 where the zip needs to go: could be 50/50 but I usually go for about 1/4 and 3/4 sections.

For all the methods you need to attach the zip to vinyl fabric using favorite method resulting in at least 1/2 inch fabric on both lengths of the zip.  I use this method (use instructions 1-7 here) -   Cut strips of fabric 2" wide fold in half, press, fold edges into the middle, press: you now have zipper binding 1/2" wide

Tuck the edge of one piece of vinyl into to the opening until it's flush with the back, pin or clip in place.  Place on top of the zip tape and sew through the zipper binding, the vinyl and the zip.  repeat on the other side of the zip so the vinyl is now once piece with a zip in it.

Cut internal fabric and external/backing fabric pieces the same size as the prepared vinyl.

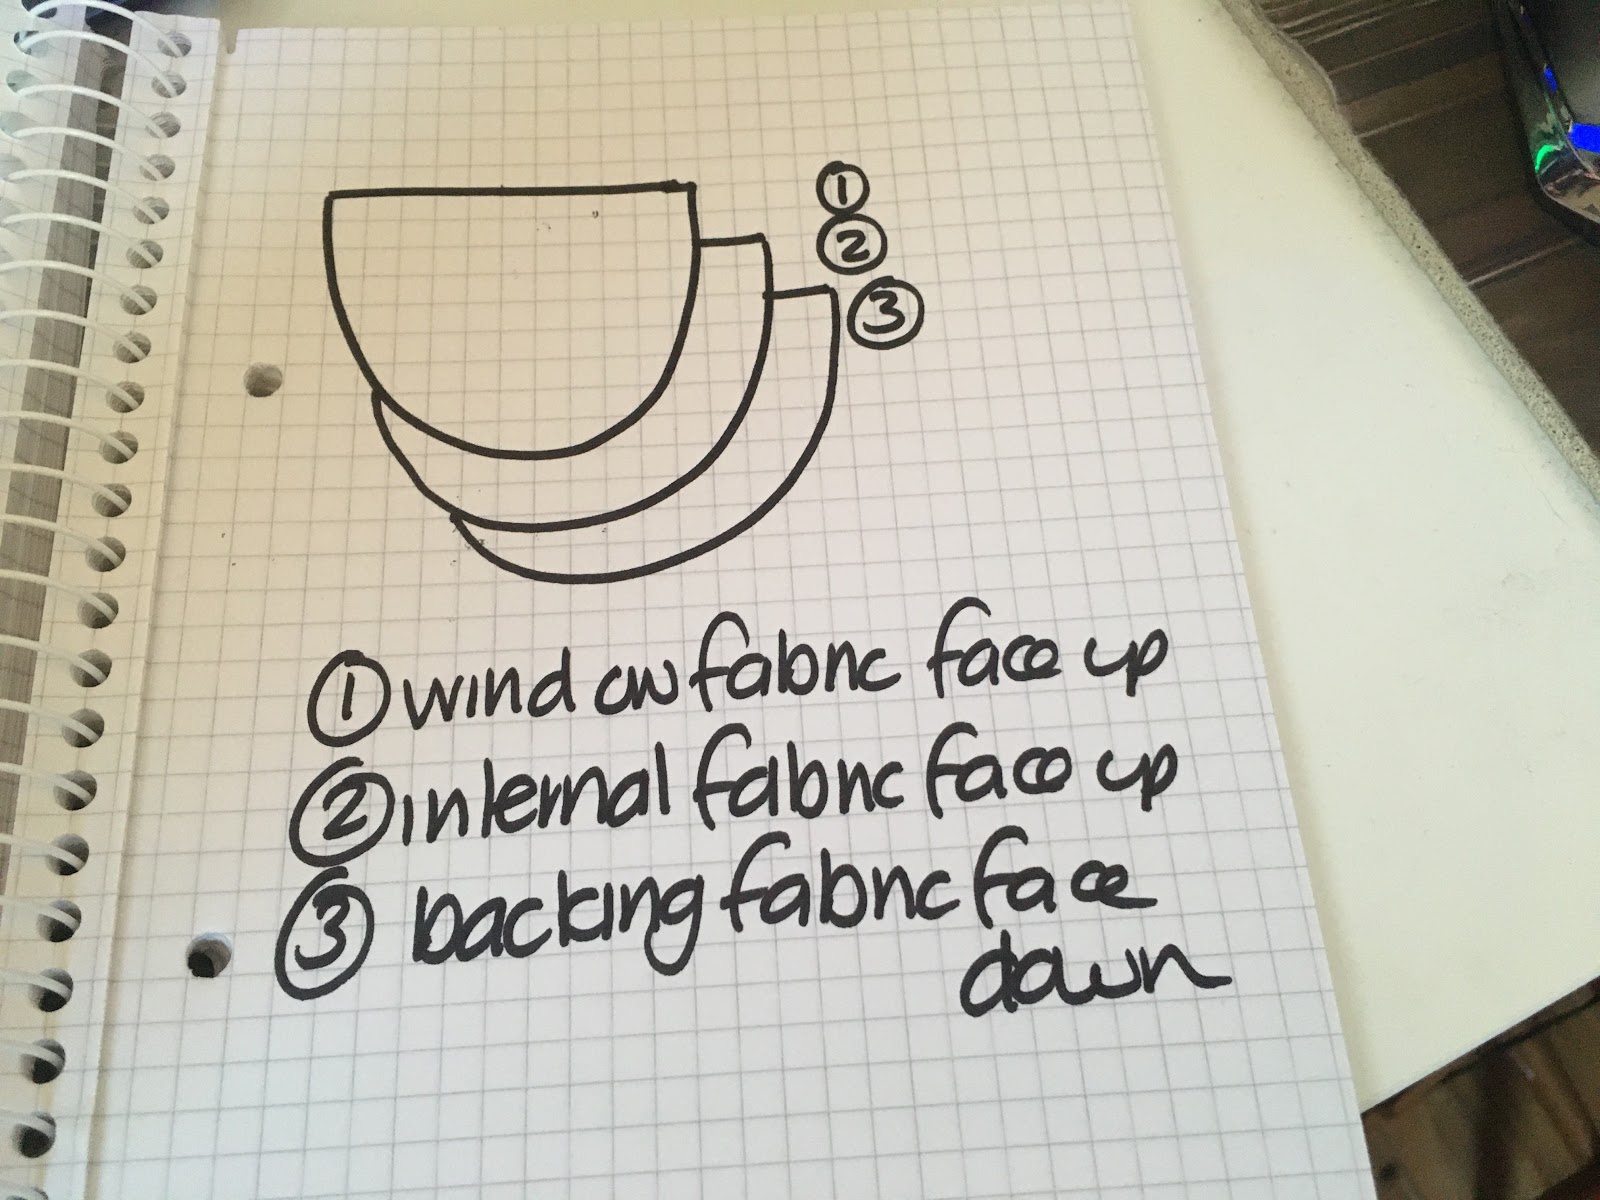
Layer fabrics as shown (but so edges match), pin in place

Non- Bias Binding method
Cut length of non-bias binding equal to perimeter plus 8".  Bind as for a quilt.
 

Bias Binding method
As above, but round the edges of the pouch and bind with bias binding gently easing around the corners

Birthing method (full vinyl front)
Stitch all the way round but leaving a 6" gap for birthing
 

Birthing method (bordered vinyl)
I prepared the vinyl/window piece by adding a border to the vinyl, then slicing into the fabric border and adding a zip
 

The birthing method pouches have not been finished so we can look at them layered up in the class.  When birthing remember to turn by putting your hand in where you can feel the zipper pull and turn that section to the outside.

Wednesday, 27 November 2019

2019 Wk 48 - and breathe

I *think* I have recovered all the lost photos (or in a few cases removed blog evidence of them!) 

That's a few days of my life I wont get back but I'm glad I put in the effort!  I do like my little blog!!!

I can say the same about this gorgeous pair of finger-less gloves (being digitally challenged I do prefer mittens or finger-less loves to normal gloves!)

Jackie has knotted me some lovely pairs over the years and they are my every-day gloves but this pair was bought in Norway by a cousin several years ago and are my posh set.  Unfortunately they had perished in a few places, and this year I have finally mended them


Not excellent but better than holes - there were six places they needed mending!

I have bought some felted sheets and plan to line them and attached them to the felt, partly for warmth and partly so I don't pull on the knitting and risk them falling apart anywhere else!!

The pouch that was being "born" in the last post is now in use.  There are a number of vinyl pockets so it's spend a few days under a cutting mat to flatten it, but it's now a hexie project bag.

A place for needles, wonder clips and thread, and a zipped pocket for templates


A zipped pocket for strips of hexies attached to each other (let's say the large yellow area is decorative, not that I miscalculated the vinyl measurements!)


a big zipped pocket for tacked hexies


and a big zipped pocket for fabric, with elastic bands for holding the growing project

  and two grab handles so it can be taken out with me

Monday, 25 November 2019

2019 Wk 48 - Drat and fiddlesticks

Fact 1: I had thousands of photos of my phone - some were family photos, some were blog photos and some were ones that had come in through WhatsApp etc and stayed.  And my phone was using battery at an alarming rate

Fact 2: I used to have to save my phone photos to my PC to be able to add them to my blog, but some time ago (my guess is September 2016*) a new option appeared so I could add photos from my phone which saved a lot of time.

Fact 3: Someone suggested that I delete some of my photos from my phone to see if that helped with the battery usage.

Have you guessed what happened?

Fact 4: I saved the family photos from the phone to the network, but I deleted the others that I'd used on the blog starting at about 2013, up to about April 2018: I planned to carry on later.

And the reason I can quote the dates?  Almost every photo on the blog between September 2016 and April 2018 has been replaced by this

I have done the hair pulling and the screaming at the computer and the crying - and finally the thinking ... Google give me 60 days to change my mind about deleting photos - phew!  So I think I have reinstated most of them!

I have managed a bit of sewing too!

This planning

and this cutting


and this making-binding-by-bodging happened (sorry about the striped ironing board cover, makes it difficult to see what I'm doing but the binding is purple and then red)

and making this

And this

And then doing this ...

More to follow when it's been pressed under a weight to get the vinyl creases out!

I've started working on this with the Kaffe Fassett 3" squares I got from Jackie - I'm really loving the fabric!  : It's planned and ready to stitch

And I've done the prep for the next Chertsey Museum class - we are doing scrappy pennies

These were fun to do.  They all started the same but I did different embroideries

And finally I've received another Pudsey themed hexie flower from the Facebook swap group I've joined.  Roll on next month