All planned now so I can start sewing

I may have done some shopping! I do have a weakness for pre-wound bobbins and was delighted when I found a UK based site selling them. Not only much cheaper on postage, but the USA site had pages and pages of machine manufacturers and which bobbin size . . . but my machines weren't on the list. At www.embroideredjust4u.co.uk, she just listed 4 choices for Brother - nice and easy!

So I treated Lizzie to black bobbins and some pretty colours, and the sewing machine (which doesn't have a name) to a whole load of colours!

Two of the classes that have had to be postponed were for a zippy pouch - one was a machine class and one was hand sewing, but both needed samples, and my hand sewing ladies don't mind if I machine sew a sample for 'their' class.
My problem is that I wont remember the construction methods when I don't to teach these so I am saving my sanity by recording the methods along with the photos here!
The instructions are very "short hand", but if you do want more info just zap me a comment or email
Curt a piece of vinyl into a square or rectangle about 1/2 inch bigger than the size you want the pouch. Cut the vinyl into 2 where the zip needs to go: could be 50/50 but I usually go for about 1/4 and 3/4 sections.
For all the methods you need to attach the zip to vinyl fabric using favorite method resulting in at least 1/2 inch fabric on both lengths of the zip. I use this method (use instructions 1-7 here) - Cut strips of fabric 2" wide fold in half, press, fold edges into the middle, press: you now have zipper binding 1/2" wide
Tuck the edge of one piece of vinyl into to the opening until it's flush with the back, pin or clip in place. Place on top of the zip tape and sew through the zipper binding, the vinyl and the zip. repeat on the other side of the zip so the vinyl is now once piece with a zip in it.
Cut internal fabric and external/backing fabric pieces the same size as the prepared vinyl.
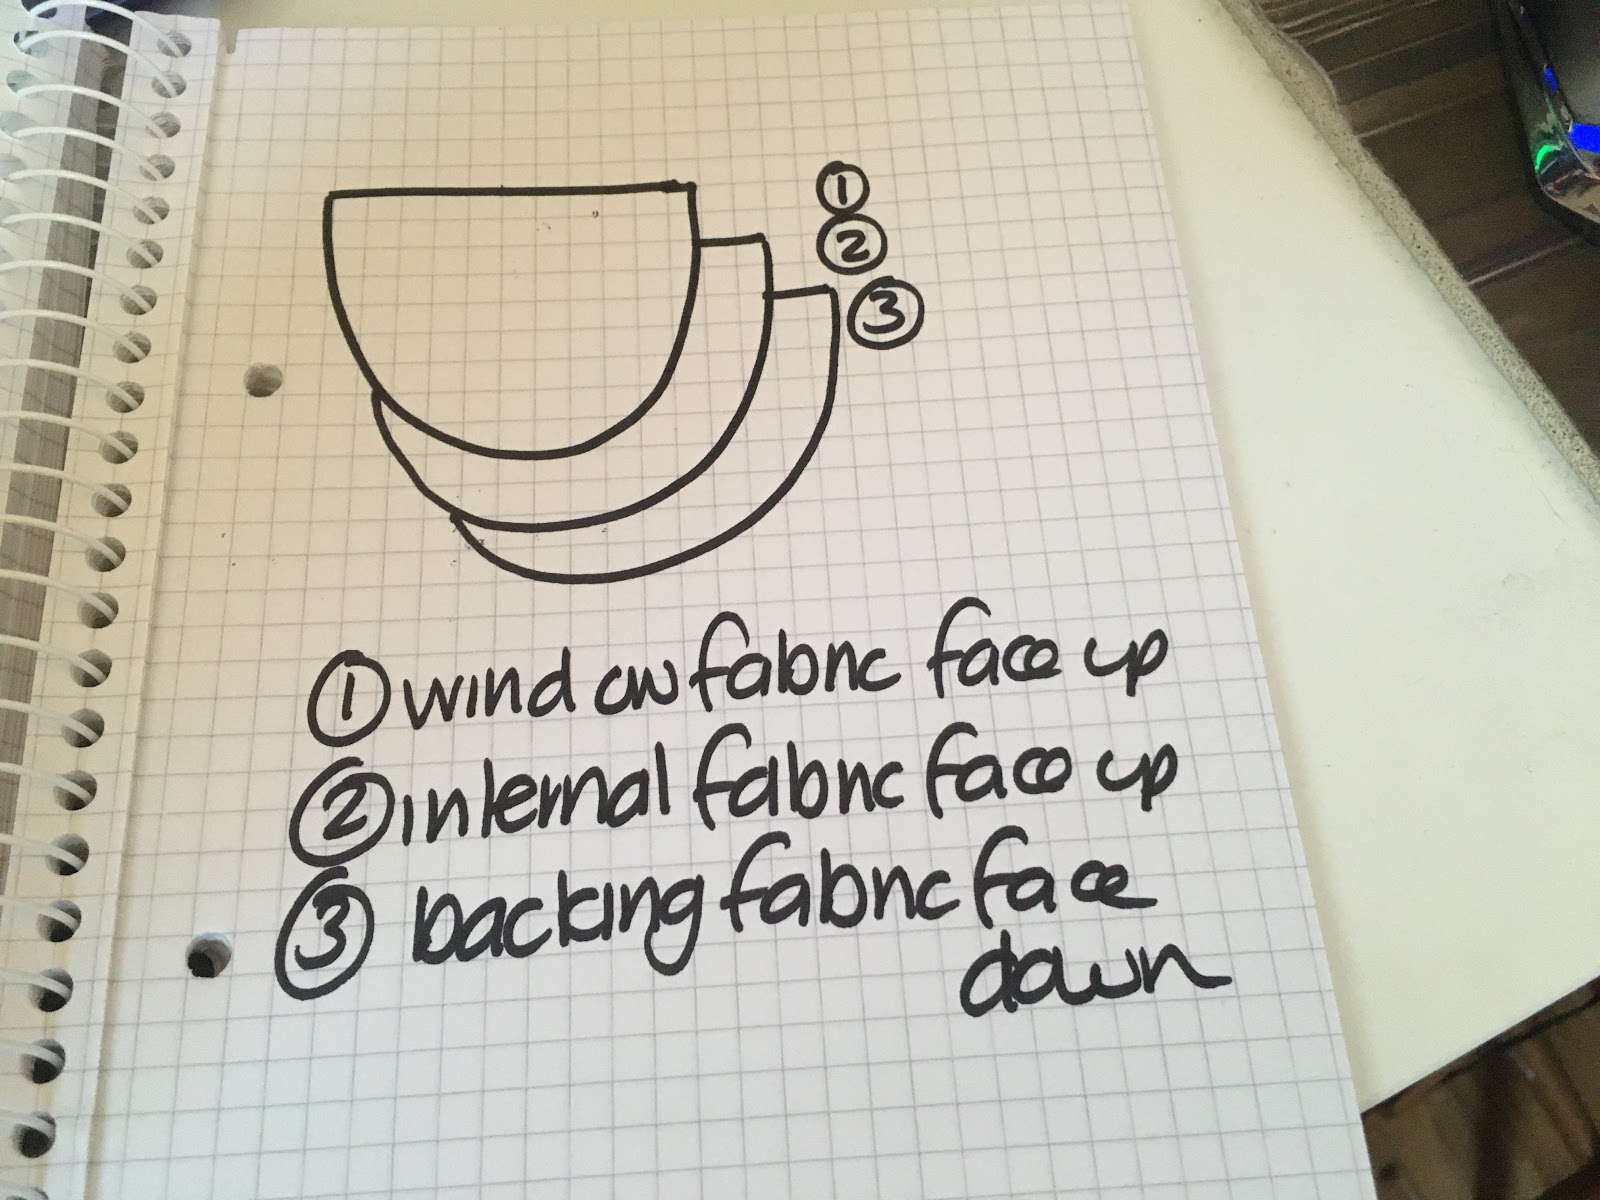
Layer fabrics as shown (but so edges match), pin in place
Non- Bias Binding method
Cut length of non-bias binding equal to perimeter plus 8". Bind as for a quilt.


Bias Binding method
As above, but round the edges of the pouch and bind with bias binding gently easing around the corners
Birthing method (full vinyl front)
Stitch all the way round but leaving a 6" gap for birthing


Birthing method (bordered vinyl)
I prepared the vinyl/window piece by adding a border to the vinyl, then slicing into the fabric border and adding a zip


The birthing method pouches have not been finished so we can look at them layered up in the class. When birthing remember to turn by putting your hand in where you can feel the zipper pull and turn that section to the outside.
Thanks for writing down the instructions x
ReplyDelete