Wednesday 29 April 2015

Rolling in Red

I seem to be on a bit of a red kick at the moment:

I've pieced and quilted Lisa's mostly red Christmas quilt

Some of the sashing is plain red, and some is printed with gold or silver Christmassy symbols.  The sashing placement is deliberate, and even required some un-sewing.  Can you see why I chose that placement? (see below for the answer)
    
And I made myself two red handy items in felt:  A wrist pin cushion and a needle case
 

And I've almost finished Niki's mostly red birthday quilt
  
No doubt which birthday she's getting it for (I cant believe I'm old enough to have a youngest child turning 21!!!)

(the number twenty one wasn't on the fabric so I've joined twenty and one together!)


And the printed sashing amongst the plain?  If you look for it, it spells Lisa's name :-)


Sunday 26 April 2015

What a Weekend

It's been a bit busy - but fun!

On Saturday morning I taught a kids' sewing class - they learned how to cut a pattern, and how to used to cut two bear shapes from fabric, how to use ribbon and lace and buttons to decorate their bear, how to sew the two parts together, the significance of an opening, and snipping into the angles, and how to stuff and sew closed . . . Not bad for 6 to 10 year olds (and parents)

Some didn't get finished at the class, but these progressed enough to be photographed:


Others got finished at home, and L's mum send me this
How cute is that????

I then whizzed to the village next to mine where I had a stall at the church craft fair.

I had set out my stuff on Friday night as I was busy on Saturday morning:

But it all looked very flat. So that evening Brian bodged a quilt rack for me:

It needs some reworking, but version 1.0 did a great job!

I had a lovely afternoon - I used to work at the village school, and at the church youth club, but haven't done for the last 4 years or so - it was great to catch up with people I haven't seen for ages. I also sold some bags and other bits and pieces which was a bit of a bonus!!

Wednesday 22 April 2015

A little bit of this and a litle bit of that

Being back at work means much less sewing time, but a few number of projects have benefited from half an hour or so sewing time this week:

I played with some ideas for two piece cuddly toys for a kids' class next weekend
 

And I made an I-spy quilt for our next-door neighbours who have just become grandparents for the first time, and I designed an in-the-hoop baby taggie for him too.


His was really a trial version, and here it is with two others which will be samples at next week's village craft fair.  Lets hope some people order them!
 

Monday 20 April 2015

Christmas Crafting (again)

As I'm hosting the Ho Ho Ho and on we Sew link up this month I thought I really ought to actually do some Christmas making beyond my tutorial.

I started a Scrappy Trip Around the World late in 2013.  The plan was that it would be for Lisa for Christmas 2014.  At the time she was living in a converted factory in London and I thought it would be nice to have something warm and Christmassy to wrap herself up in

I got this far, and then realised my fabric placement was a bit naff:

Scrappy trips look better if they aren't alternating light and dark blocks - because they just might as well be alternating dark and light blocks!
 

So I considered a couple of sashing/no sashing possibilities

And there it stalled: partly because I couldn't decide, and partly because Lisa announced she would be going to Australia *just* after Christmas - so I didn't think there would be much point having a Christmas quilt which she'd get on Christmas day and leave behind on boxing day.

Anyway, fast forward a year and a bit: I seem to be in the mood for reducing UFOs at the moment, and the Ho Ho Ho linky got me thinking abut this one.  So I have now sashed the blocks mostly with plain Kona red solid.  There is some sashing with gold shapes on, and there is a reason, but I cant yet photograph it well enough to show you.  At the moment there are 5 separate strips of blocks, but in a few days I'm hoping to have it backed and machine bordered, and then I can show you.

 Have you finished anything Christmassy this month?  The linky is open until the end of the month if you want to link up - just click here to go to the linky post

Sunday 19 April 2015

Easter's (Nearly) Over

One of the major advantages of working in a school is the school holidays. For everyone else Easter was over and done with nearly two weeks ago, but I'm clinging to the last few hours before 'Easter holidays' becomes a normal working week!

So what have I been sewing?

I pieced and machine bound this quilt (it's twin was only finished 11 months ago!!!)

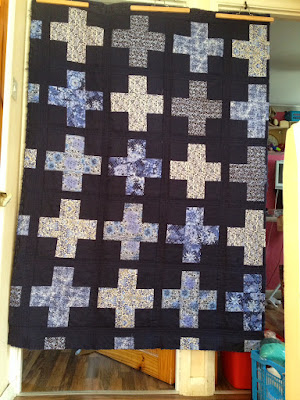
I attached the blue plus blocks to a fleece, and having mucked up the centering was driven mad by it's not-quite-symmetrical ness

And had to chop a bit off one side and the bottom

I made some little project bags to be sold at Richmond and Kew quilters exhibition in the autumn,

I made a sample tote bag for a customer,

 and a trial version which will hopefully lead to a whole load that I'm hoping to sell


Saturday 18 April 2015

Christmas Crafting


Some of you are new visitors, popping over from the Ho Ho Ho and on We Sew link party - welcome.  Others are regular visitors - and if you haven't yet met Fiona and Paula and the other Ho Ho Ho-ers, do pop over and make their acquaintance.

They are on a mission to put a stop to the last minute sewing that all too often happens during December, and are encouraging us to take it easy, making bits and pieces throughout the whole year.

For those of you new to the Link Party, the posts are scheduled for the 18th of every month and the Link Party remains open until the end of the month to give our fellow bloggers lots of time to link up their Christmas and Holiday makes.

As well as encouraging us, there is a whole schedule of posts of Christmassy ideas to help us out
JanuaryCeltic Thistle StitchesFionahttp://celticthistlestitches.blogspot.com
FebruaryThreading My WayPamhttp://www.threadingmyway.com/
MarchWonky PatchworkSallyhttp://wonkypatchwork.blogspot.co.uk/
AprilSLIK stitchesBentahttp://slikstitches.com/
MayPractically PippyKarenhttp://practicallypippy.blogspot.co.uk/
JuneCharly and Ben's Crafty CornerRuthhttp://benandcharlyscorner.blogspot.co.uk/
JulyWeekend DoingsMarthawww.weekenddoings.blogspot.com

Patch the GiraffeChelseahttp://patchthegiraffe.blogspot.com/
AugustSunshine Through the RainDeborah http://sunshinethroughtherain-deborah.blogspot.co.uk/
SeptemberPractically PippyKarenhttp://practicallypippy.blogspot.co.uk/

Party of Eight: Our StoryGinahttp://partyofeightourstory.blogspot.co.uk/
OctoberElla and Nesta's Little RoomNesta http://ellaandnesta.blogspot.co.uk/
NovemberRose & DahliaJoannehttp://rosedahlia.blogspot.co.uk/
DecemberMud, Pies and PinsPaulahttp://www.mudpiesandpins.com/

If you look careful at that list, at just about now, you'll see someone called Benta at SLIKstitches is due to share a Christmassy project . . . so I guess I'd better get on with it!

I have made a calorie free Advent Calendar - after years of chocolate ones when the girls were younger I think this one is much kinder to my waistline!
 

I used 1/2 yard each of three fabrics, plus extra to bind.  I used fabric that had been cut into charm squares (5"x5").

FOR THE COUNTDOWN NUMBERS
If you are using yardage, initially cut 12 squares from one fabric, and applique, embroider or use fabric pens to add the numbers 0 to 9, plus an extra 1 and 2.  If you choose to use bondaweb, or heat&bond or similar you probably wont need to stitch them down.  I am lucky enough to have an embroidery machine so mine have been machine appliqued.  Make another piece, a rectangle this time, twice the size, with the word "sleeps" on it using the same method

Starting with 1 and 2, place the two numbered pieces right sides together.  Pin two sections of thin ribbon a little bit in from the top corners to make the hanging loops.  These need to be *between* the two parts, touching the right side of both fabrics, hanging inside (so you can see the bits shown here in black, but the grey section isn't visible unless you look between the two pieces of fabric)


 Stitch most of the way round (including all 4 corners), but leave an opening for turning

Stuff with a handful of toy stuffing and then stitch the opening closed.  Continue with the other numbers, pairing 3 & 4, 5 & 6, 7 & 8, 9 & 0, and another 1 & 2 and finally pair "sleeps" with another piece of fabric

FOR THE WALL HANGING:
As I had charm squares I used six greens charms along the top and bottom, and I used a green, four creams and another green for each of the middle rows (16 greens and 8 creams in total), but you could use yardage or scraps.  Mine finished at about 27 x 17½" 

I spray basted it onto wadding (batting) with more fabric on the back, and quilted it with free range lines from left to right.  I used green thread for the green areas and cream for the cream areas

I arranged two number 'cushions' and the 'sleeps' cushion to a suitable place in the centre panel and marked where the top of the ribbons should be, and I stitched buttons in the right places.  
 
I also added six pairs on buttons below to park the unused cushions

I folded two charm squares in half diagonally and basted them in the top right and top left hand corners.  I then added the binding to the wall hanging including the triangle edges.

I could then use a stick the same width to hang it on my display hanger


TIPS FOR SEWING ON A BUTTON:


Start with one piece of thread, but thread both ends through the needle.


This means you can use the loop at the end to anchor the thread - no knot required


You want a bit of space behind the button, to allow the ribbon to fall snugly behind it.  You can create this by including a pin on top of the button while you are sewing.  Stitch from hole to hole half a dozen times over the pin


Then remove the pin and wrap the end of the thread around several times, between the button and the cloth, to create a shank.  Knot the thread on the back and hide the ends in the fabric


Now the ribbon will fall easily behind the button.


WHAT DID I LEARN?
I used elastic to hang up my little cushions - and I'm suggesting you use ribbon.  It seems the needle takes the path of least resistance and that will be either side of the elastic, not through it, so any pressure on the elastic will cause it to pop out!

FINALLY

If you are inspired by this or any other Ho Ho Ho and On We Sew post, do link up with Fiona and Paula - there are goodies to be won!!!

I have had major issues with adding the links - Fiona has been very patient but I.Just.Don't.Get.It!!!  This post is set to go live at midnight my time so I wont be checking it until 8 or so hours after that.  If the following looks fab, it's thanks to Fiona - if it looks like gobbledegook? Blame me!


This month's linkup is kindly sponsored, thank you very much, by

and the fab prize is this:


Thanks to all the regular sponsors too


Thank you to Fiona and Paula and all the other Ho Ho Ho-ers