Showing posts with label woven. Show all posts

Sunday, 2 August 2015

Five a Day (almost) Finished

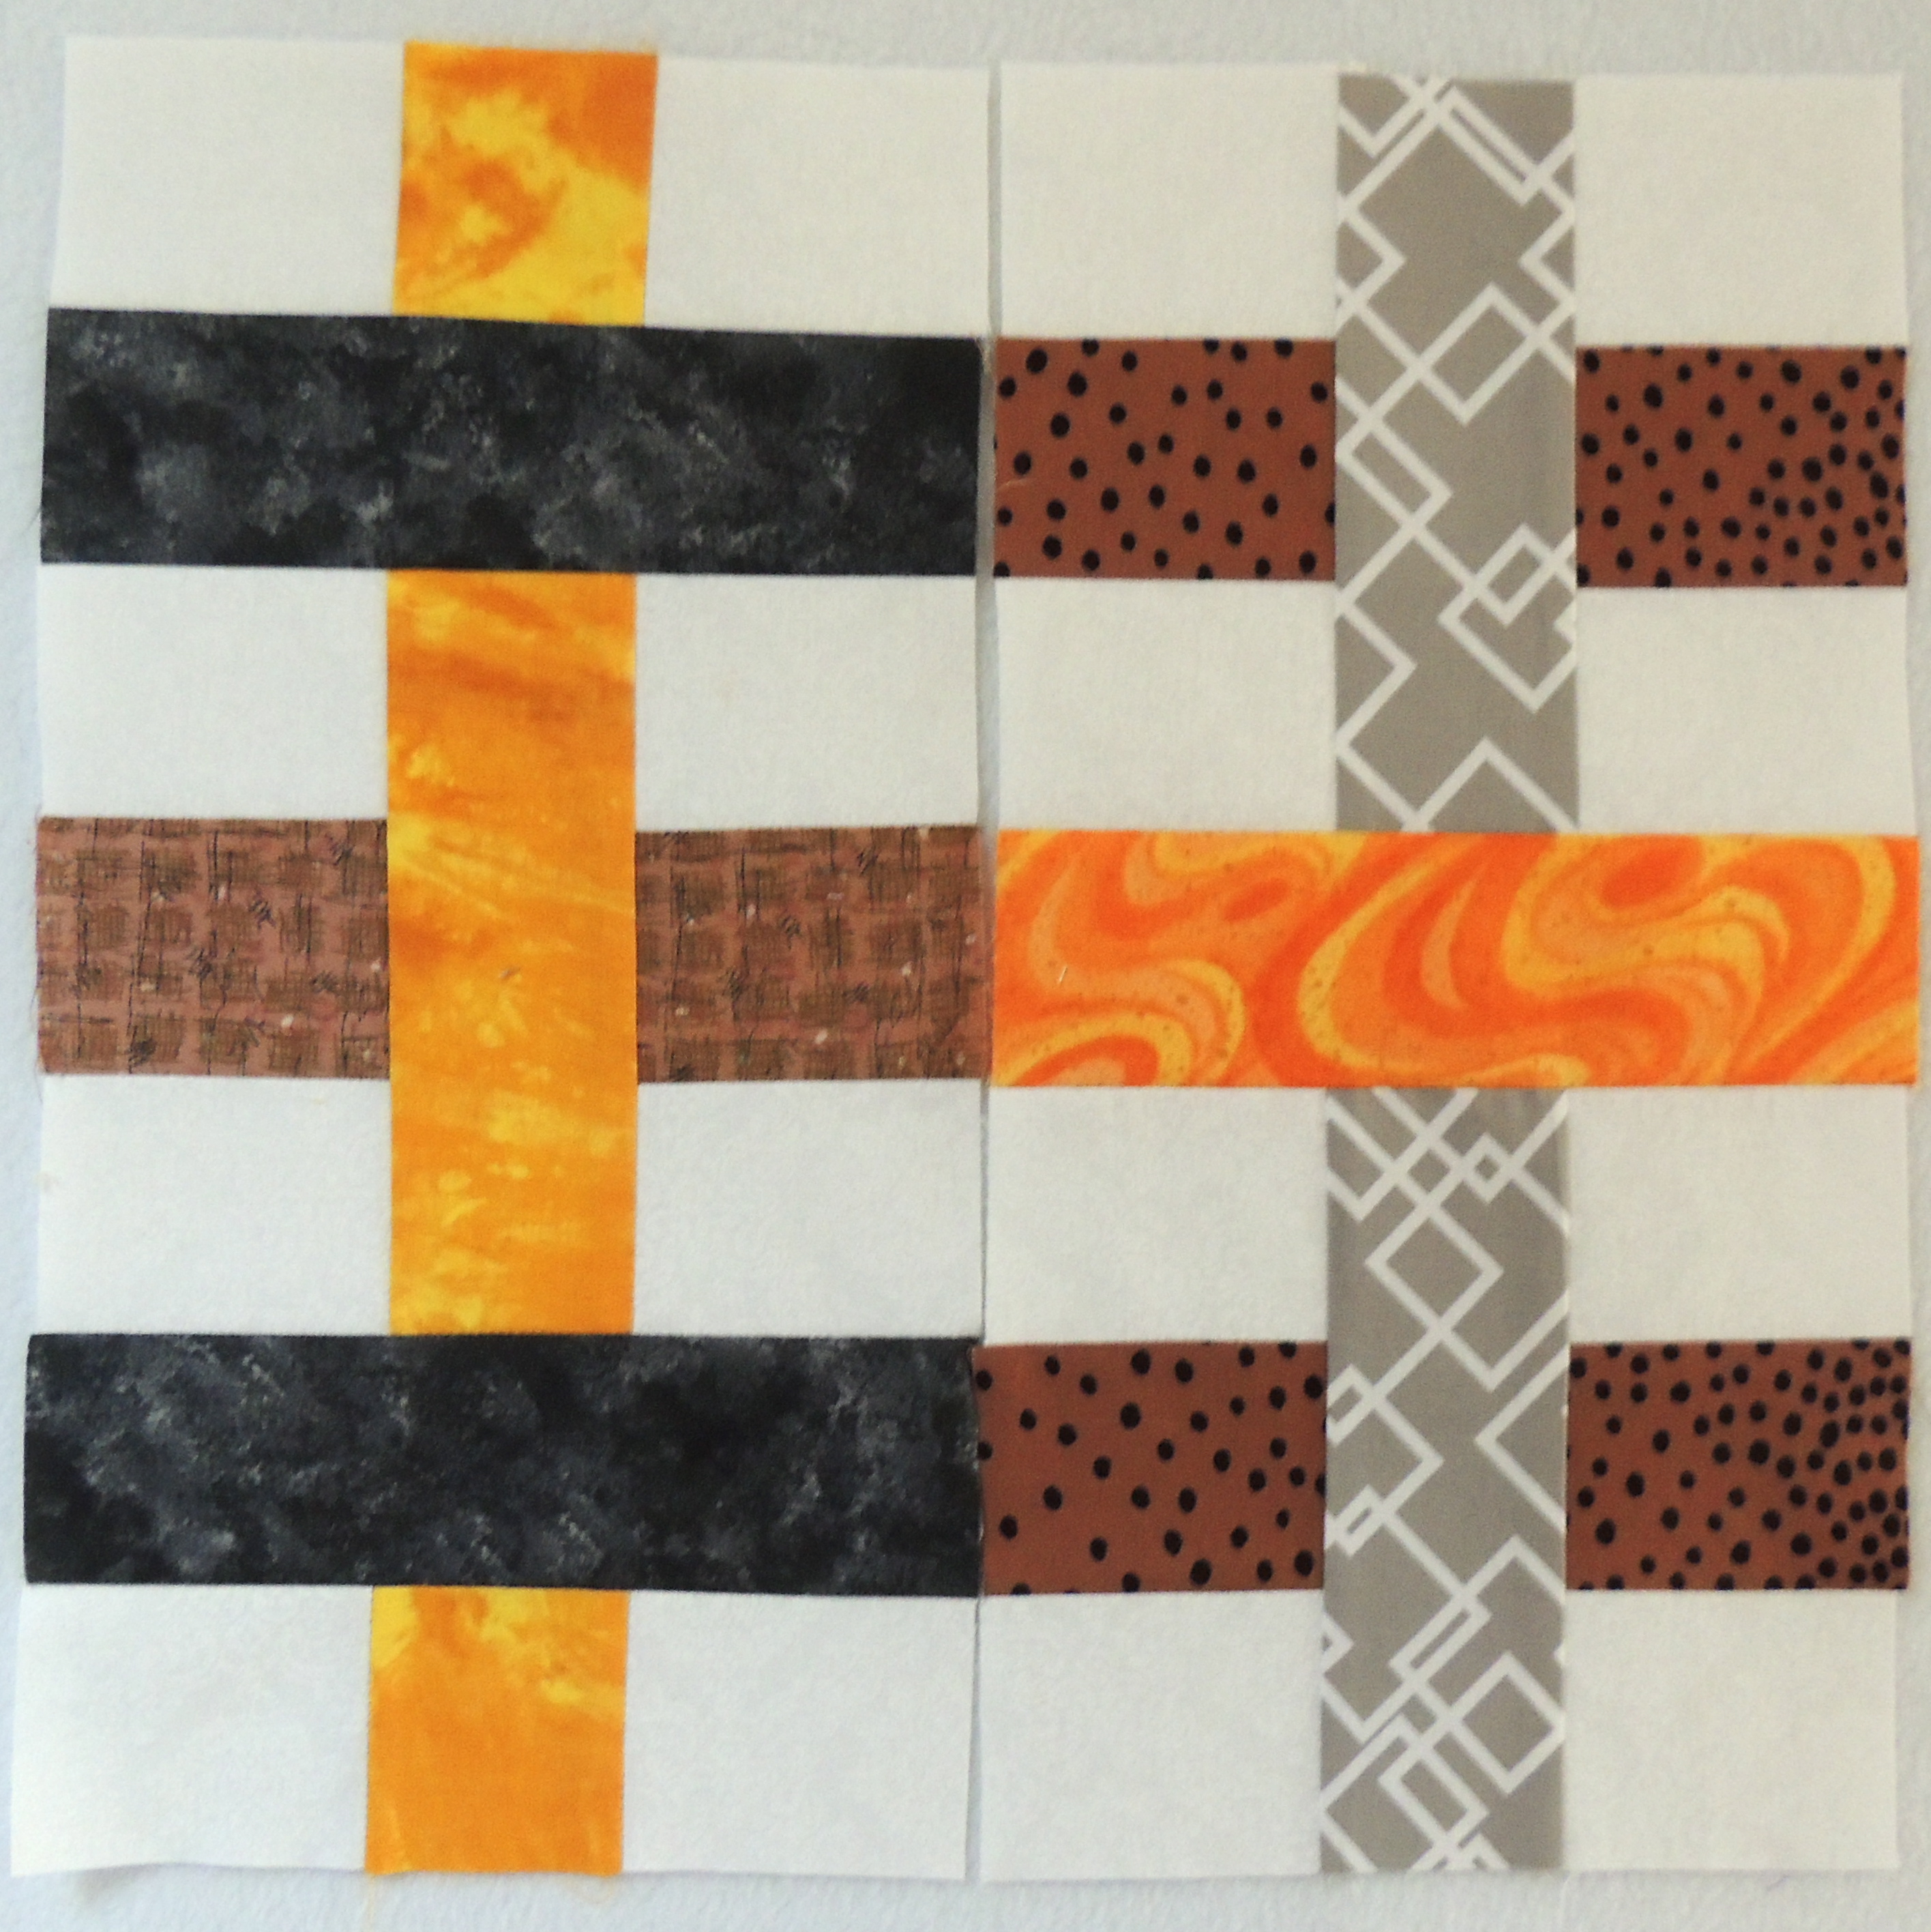
This woven quilt builds up quite quickly, so once I had the extra black yardage I could get it done and machine bound. I'll hand sew the binding to the back when it's a bit cooler.

This could be made from FQs, although I had half a yard of each fabric which was far more than necessary!  (this is quilt number 2, and number 3 is also under construction, and there is enough left for a few tote bags too!)

It looks complicated, but I cut 5" strip x width of fabric from each fabric, and added 2.5" x wof to each long edge.

Once I'd pressed seams to the dark side I checked the total height and it was 9" (yay for 1/4" seams). I then sub cut the units into 9" squares so I could arrange them into a woven design
 
Then I did a bit of speed dating to arrange the blocks. I've seen this quilt done with random placement, and that's fine but my slight OCD means mine has to *look* woven, and all the red and orange fruits and vegetables have to go one direction while the others go the other way. Like they say at Subway, I want it done my way!

Because I wanted it on point, some of the blocks had to be cut through 45 degrees - if you are having a go do check TWICE that you are cutting on the right diagonal (no muttering at the back as to how I discovered the importance of this)

These sized blocks fitted perfectly onto an IKEA fleece (51x67") and the left over 5" blocks are being made into this bonus quilt, AND I've shifted a pile of stash fabric - all good!  


Sunday, 7 June 2015

Woven Windup

A few days ago I assembled the woven blocks quilt, and (since this photo) got the binding machined on, so it just needs the second side hand stitching down.  I used a new fleece from Ikea, a lovely marl grey

 I'm really pleased with the effect of it, although some seams didn't match too well

I actually had enough fabric that it could have been a bit bigger, but I'd run out of fleece so it stopped at Ikea's standard size: 51x67", but that left me with fabric, and I'm trying to finish project fabrics.

Having enjoyed making the white Sweet Sixteen blocks I decided to start one with the leftover Woven strips


I joined together quite a few strips, pressed them, and cross cut them

I'll need to arrange them a bit more randomly, as my *actually* random attempt has too many fabrics near their twin.

I shall have to used Avril's planned random method - she calls it Randoku - random, but not repeating in a block, column or row!

Thursday, 14 May 2015

Wednesday Weaving

I have a love of quilts that appear to be woven or are woven:

I made this 4 years ago

And this 2 years ago

and two of these 2 1/2 years ago

And started this 4 1/2 years ago (but still not finished it)

and for the last six months I have been pondering this block from Block lotto (October 2014)


I've finally given in, and yesterday I was sewing black strips to either side of strips from a black and red and white jelly roll


 - I've even done a plan

I'm loving it already!!!


Thursday, 23 May 2013

Less of a Lull

So as I left you yesterday I was making blocks for a quilt that didn't excite me, while I tried to work out what I could do with my Moda Essential Dots, and what could I use to make a Giant Star?


So this is how my sewing time panned out:

The blocks have been assembled,  
Hmm The problem with the fabric collection seems to be the red and the gold, they are a different tone to the others. But if I take them out I only have four fabrics that belong together.

The borders have been added,

Hmmm What fabric shall I use for the Giant Star?
 
 Some of the left over fabric got 'piano keyed' and added as another border
Hmmmm, I could use the 4 fabrics I have to make the lone star, but it would be better with all different fabrics

A few more borders to use up all the project fabric, and I seem to have a quilt top, and what's more I love it again.
Meanwhile ... Hmmmmm I wonder if there are any other shades of Essential dots?  

A quick visit to ThreadBear, and a few clicks later and I think that teeny problem has been solved!!!!  So a finished top, AND a plan for the Giant Star when my squishy arrives!!!!!

Wednesday, 22 May 2013

A Little Lull

I haven't blogged much about sewing recently as I haven't really done much.  I think it's due to some fabric that I really want to use (but not sure what to do with it) and a design I really want to make (but don't know what fabric to use). Very disheartening.

Instead I've been despondently plodding with an old UFO from a workshop I did with Jan Hassard and the Richmond and Kew  Quilters in 2011.  I haven't really been feeling the love here either but after 18 months I just decided to get on with it. 

I was so 'bleugh' about everything I didn't take stage photos, but basically I had loads of 1 and 1.5 inch strips in shades of red and black and beige.  I used these to make 36 offset log cabin blocks.  Half had the two narrow sides made of red, 

and the other half had them made of cream.
 (Indoor, flash photos, the cream colour is somewhere between these two shades)


As I made these I pondered my two problems: one being the fabric I want to use, and the other being the quilt top I want to make

This is the fabric: Essential Dots from Moda,


 I love, love LOVE the colours, but feel that the bottom two don't really belong with the other shades, and without them I don't have enough fabric to make anything.

As for the quilt I want to make - it's the giant star that lots of people made a while ago:

This is Katy's version


And this is Nicky's 

Aren't they yummy!  I also fell in love with a version Hadley made a year or so ago, but I certainly don't have charm squares in the right colours

(hope it was OK to borrow your photos, girls xxxx)

I *may* have come up with a solution, I'm off to bed now, I'll let you know tomorrow 


Monday, 14 January 2013

Tops For Tasmania

I've finished one pink and turquoise woven top to send to Jess for her Tasmanian Bush Fire appeal,


and I've got about an hour's work left on this one. 
It's actually assembled on a pink sheet, so it only looks as if there is a lovely pink border, but I've run out of useful lengths of fabric, and it's not as big as the other one.  I think one black border, then a scrappy pink and black one should bulk it out to the same size.

Saturday, 12 January 2013

Stripping and Speed Dating With My Daughter

No, not that kind of stripping, OR that kind of speed dating!

When you left me yesterday, Lisa had come home feeling poorly. 

After TCL, and cat cuddles . . .


(two dozen patchwork quilts in the house and I photograph her with a shop bought knitted blanket, sigh!)


. . .  she was up stripping wallpaper in the kitchen
  

. . .  and helping me speed date some quilt blocks.
 

Thank you sweetie x x x


These blocks started off as a 'will this work?' project with a few blocks
 

Then went into mass production with 2.5" pink or turquoise strips being sandwiched with black, 

Then being cross cut into 2.5 wide three patch blocks (and added to 2.5" x 6.5" pink, and turquoise strips)


And finally being speed dated into a woven pattern . . .


. . . which will hopefully look better once it is stitched.  There are enough blocks to make another one too, but it would have been much easier to use one pink and one turquoise fabric - not three of each!.  The second one will also be woven but the fabric will vary along the 'ribbons': switching between batik, dotty and plain.

I've got a good idea where these quilts are going too (no, NOT on the UFO pile) but I'll tell you about that tomorrow

Monday, 11 June 2012

Holiday Happenings (part 3)

 On Friday I taught Junk Weaving Wall Art at Chrtsey Holiday Activities to a dozen kids, and several mums!!!

We started with a show box lid (thanks mummy) and cut notches and wrapped string, then delved into a pile of junk, and got weaving.  Better instructions are on the Fun With Fabric blog, but here is one of the busier ones

And here is a mosaic of all of them

And some mums having a great time - just before I took this there were 4 of them weaving the junk treasures that their kids had found!!!!

As a group project we also wove some t-shirts: referred to as The Windmill, this will become a floor mat for the museum: I showed the first two kids how to do it, they taught the next few, and so on, until everyone had had a go!

Sunday, 30 October 2011

Weaving Fun

Yesterday was the class with Jan Hassard.  This is a really quick post as I'm off out for the day, so stand by for lots of photos

(Katy - yet another new project, just 4.5 weeks until I go, hellllllp!)

 I started with 1m of assorted creams, the same of assorted dark reds and .5m of black - all cut into 1 inch and 1.5 inch strips.


We then made (or at least started to make) 18 lopsided (cant remember the right word, sorry) log cabins going clockwise, and another 18 going anti-clockwise

These are mine

and this is one of Plums (she was sewing with a scant 1/4 inch seam, while my machine didn't have an adjustable needle position, so mine was a huge seam, so a big difference in block sizes)


But do look at Plum's awesome 'featherweight' sewing machine

The display board doesn't quite show the end plan as we were all doing (at this stage) anti-clockwise blocks, but you can see here the great variety of colours (and block sizes, LOL)

(Mine is the skinny one, 8th from the left, Plum's is 5th from the left)

This is the aim: mine will be red and cream on black.  I love the design and once I'd got the hang of it the blocks were quite easy.  I will finish it, and I might make more blocks to make it bigger, but not until after Christmas

It was a great day, 6 hours just sewing - bliss!!!!!

Friday, 28 October 2011

Today and tomorrow

Today I managed to progress Swirls to the 'hand stitch the binding' pile, and Heather's black and White and pink to the 'needs binding' pile, so things are getting better.

Tomorrow I am off to a workshop with the Richmond and Kew Quilters. We are going to learn how to make Jan Hassard's woven log cabins (http://www.janhassard.co.uk/interwoven.html). I am really looking forward to it.


Full report tomorrow soon :-)

Sunday, 22 May 2011

Woven Denim Bags

The ladies at both Chertsey Museum, and Windsor Library have made these no-sew denim bags, but Iris missed the lesson and asked for details ... so I thought I'd type up a brief summary.

No stitching is required so long as you have access to a glue gun, otherwise, some stitching will be required.

You can see from these examples, that the instructions are far from definitive - treat them as a guide and then go and do your own thing!!!
 NICOLA'S
We started off with a very basic bag shape from blue fabric.  This was stitched right sides together, along both sides and the bottom.  This was to give the finished bag integrity (so nothing could fall out) and a skeleton to work on.  Turn the bag right side out.
[If anyone wants to have a go, let me know and I will post you a basic bag]
We then got a few pairs of jeans and started ripping!  The best way is to cut into the hem every 2 inches or so, and then hold either side of the cut and rip.  You might want to do this outside as it creates loads of blue dust!

 JENNY'S
The top photo here, Nicola's bag,  shows a bag just using dark blue denims, while the others generally have a variety of lights and darks, this is down to personal choice, and what jeans are ready to be sacrificed!  The reverse of the denim is usually a different colour to the front, so this could add more colour variety if wanted

Take half a dozen long strips and pin then at the top of one side of the bag, just touching. you may need more or less strips, maybe ripping another strip to the required size to fill the width of the bag.  These strips need to be long enough to go down the front, wrap around the bottom, and go back up the back, back to  the top of the bag.  Pin them again at the top of the back.  it will now look similar to Ann's in this picture, but without so much blue showing through the vertical gaps.
 ANN'S

Well done, go and make a cup of tea!

 Now take another strip, and starting at the bottom of the bag, weave it under and over the vertical strips, around the whole bag. Arrange the strip so the join is a two inch overlap, and is hidden behind a vertical strip.  Put a pin through the hiding strip, both ends of the horizontal strips, and the blue bag.  Put another pin in the same square.  These will serve to remind you later that this is a joint.

If you want to use more pins to secure this strip that's fine, but it shouldn't move too much if your vertical strips are snug, and the first horizontal one is pushed down the the fold.
 BENTA'S
Repeat with the next horizontal strip. again using two pins to mark the joint.

Keep going until you get close to the top.

Once you are happy that the strips are all in the right place, and no adjustment is needed, you can fire up the glue gun.  If you don't have one you can use needle and thread, and maybe some buttons.  Basically you need to secure all the joints, (all the double pins) and in some places join the denim to the bag to prevent too much movement.  Either a dollop of hot glue between the layers, or a few stitches through all the layers.

The original bag (Benta's, 4th photo) was finished at the top using the waistband of a pair of jeans.  The third photo shows Ann's bag finished with a folded strip of denim secured inside and out, while the 2nd photo, Jenny's bag was finished with machine stitches - it's your choice!

Again there are choices for the straps: I used the remains of the inside leg seam through belt loops, Jenny stitched on short thin strips of denim, while Jess glued on long wide strips - there is no wrong!

Hope this is enough information for you to have a go, but if anything is unclear, please do not hesitate to  email me (Benta@SLIKstitches.co.uk) and I'll get back to you

Some more varieties ...

STEPH'S
Steph made this bag with just one pair of jeans, and incorporated a pocket from the jeans...

  JESS'S 
... whereas my lovely Jess has a total disregard for convention (so refreshing in a 16 year old), and her bag included scrunched strips, waistbands, pockets, buttons, and some random weaving!