Showing posts with label quilt as you go. Show all posts

Sunday, 12 August 2018

2018 Wk 33 - mostly Rainbows

Just look at these lush threads I used today!

My old Boss has been training to become a Methodist Minister and starts this on 2nd September.  I was honoured to be asked to make him a stole, but then panicked and have procrastinated for several months.  However 2nd if September isn't that far away, so today I pulled on my big girl pants and cut the first two pieces, and embroidered them.  He was a maths teacher before being a Head Teacher and now Minister so a cross made of triangles was ideal for this side.

The other side will be purple, and I'll do a Celtic cross for that side - maybe next weekend!

At the same time as embroidering the rainbows, and Lizzie was embroidering some uniforms, I was sizzixing card pieces for a WW1 project starting next weekend, and sizzixing fabric for Chertsey Museum in a few week's time - my lovely new big desk is only just big enough to hold everything!

These hexies are the start of a rainbow quilt-as-you-go project for Chertsey

I got a bit further with them tonight but they need stitching together still

I also did some patches for aprons for Monty's Popdog stand

And embroidered over 50 pieces of school uniform . . .which made a *bit* of a dent in the pile - just 125 left to go!

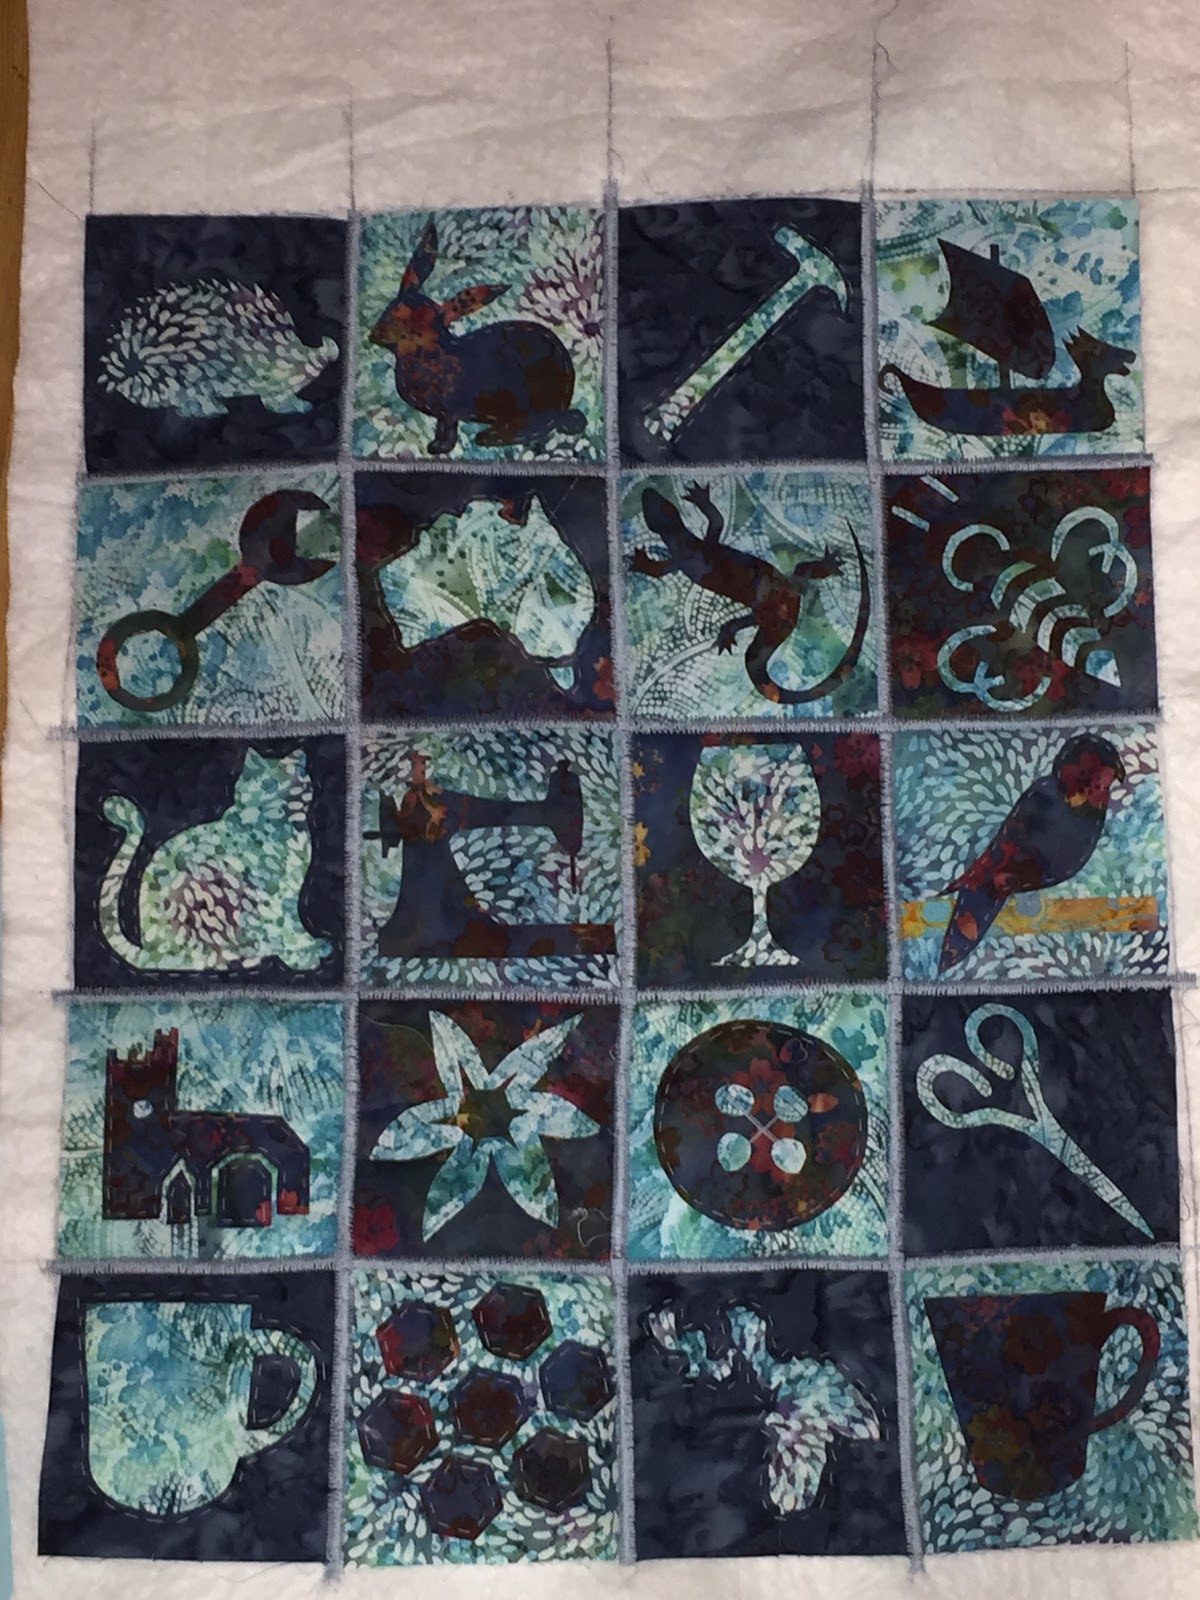
And earlier this week I finished hand quilting the last block (Australia) and put together the pieces from my interchange applique.  I decided to make two mini quilts rather than one big one as I only wanted one of each shape on the quilt.  I can't remember how to finish the edges so I'm hoping a R&Q friend will remind me (that's probably you, Plum!)

In case you can't make out the shapes, they are, from top left to bottom right . . .
  • Scissors, Boris the skink, Halsnøy Island (south of Bergen), husband's spanner
  • Button, wine glass, coffee cup (UK), Mr Twiglet the hedgehog
  • Daffodil, Viking ship, Cat (representing the 7 we've had over the years), Tango the rabbit
  • EPP Hexies, husband's hammer, sewing machine, coffee cup (Ireland)
  • Australia, St Michael's Church, a bee (one of 4: we live at 4B) and a budgie (representing 4 budgies and two+ lovebirds over the years (they were a breeding pair: 14 chicks in total I think)


And the same again, but inverse design, and different placement
 Back to work tomorrow for a rest I think!

Sunday, 13 May 2018

2018 Wk 18 - Sewing with Jackie Part 1

A perfect weekend!

Jackie arrived, lots of sewing, Crafty Church, a bit of fabric and wool shopping and mostly decent weather!  What more could I ask for?

Zippy pouches from lined hessian (I'll be finding hessian dust for weeks but they didn't need any stabiliser!

Do your children every actually ask you to make something?  Usually I get "It's lovely mum, but I really don't NEED another quilt" but on this occasion it was "mum, can you and Jackie make a chemo quilt for Claire at work? Any colours, any design (more points there kiddo, well done!) but plenty of blank space so we can write messages for her", so this has been started

We made a box pouch with a vinyl pocket  - finished item will be in the next blog post, but the pain that was making the bias binding is evidenced here - never again!

Tara at Crafty Church brought in her WW1 Heart Pincushion kit.  Explained here, it takes the occupational therapy practiced by injured soldiers in WW1 and has turned it into a commemorative project for the 100th anniversary of the end of the war later this year, asking people to recreate these hearts for an Art installation.  For example:

Some of us will buy one the of the kits for the Untangles Threads project, but we also decided to make named hearts for the 7 soldiers from our village who served in WW1

Lesley brought in a picture of an Amsterdam street she has completed.  It has been framed and I really struggled to get a pic without reflection, but it's worth zooming in to have a closer look.  it is all made of fabric, stitched in place.  She made each house twice - so there is a mirror image house upside-down in the water!  Its absolutely stunning


The next post will follow when Google photos has caught up with the photos I've taken!

Thank you Jackie - I've had a wonderful weekend -I love you xx

Saturday, 20 February 2016

Sweat Shop and Sweet 16

I've been embroidering uniform for a local transport company.  Each item takes 7 minutes to embroider.  There is no point in going off and doing anything around the house as I'll need to be back soon; there is no point in starting anything new, as I'll get distracted and forget to set up the next item . . . so . . .

I dug out all my sweet 16 blocks (some of them shown here)

and started assembling them in strips.  Using my Quicker Than Quilt As You Go method I've got it started yesterday

And have them all assembled today


The embroidery?  Two big Ikea bags filled, another 14 items then I'm done!


Sunday, 28 December 2014

Quicker than Quilt As You Go

I've mentioned this method before on the blog, and it's what is helping me assemble / baste and quilt these strips of blocks so quickly - a few hours and they are ready for binding.

I know the result is a Coverlet rather than a Quilt (two layers rather than three) but it is just as long lasting, much cheaper, and MUCH quicker than the conventional method.

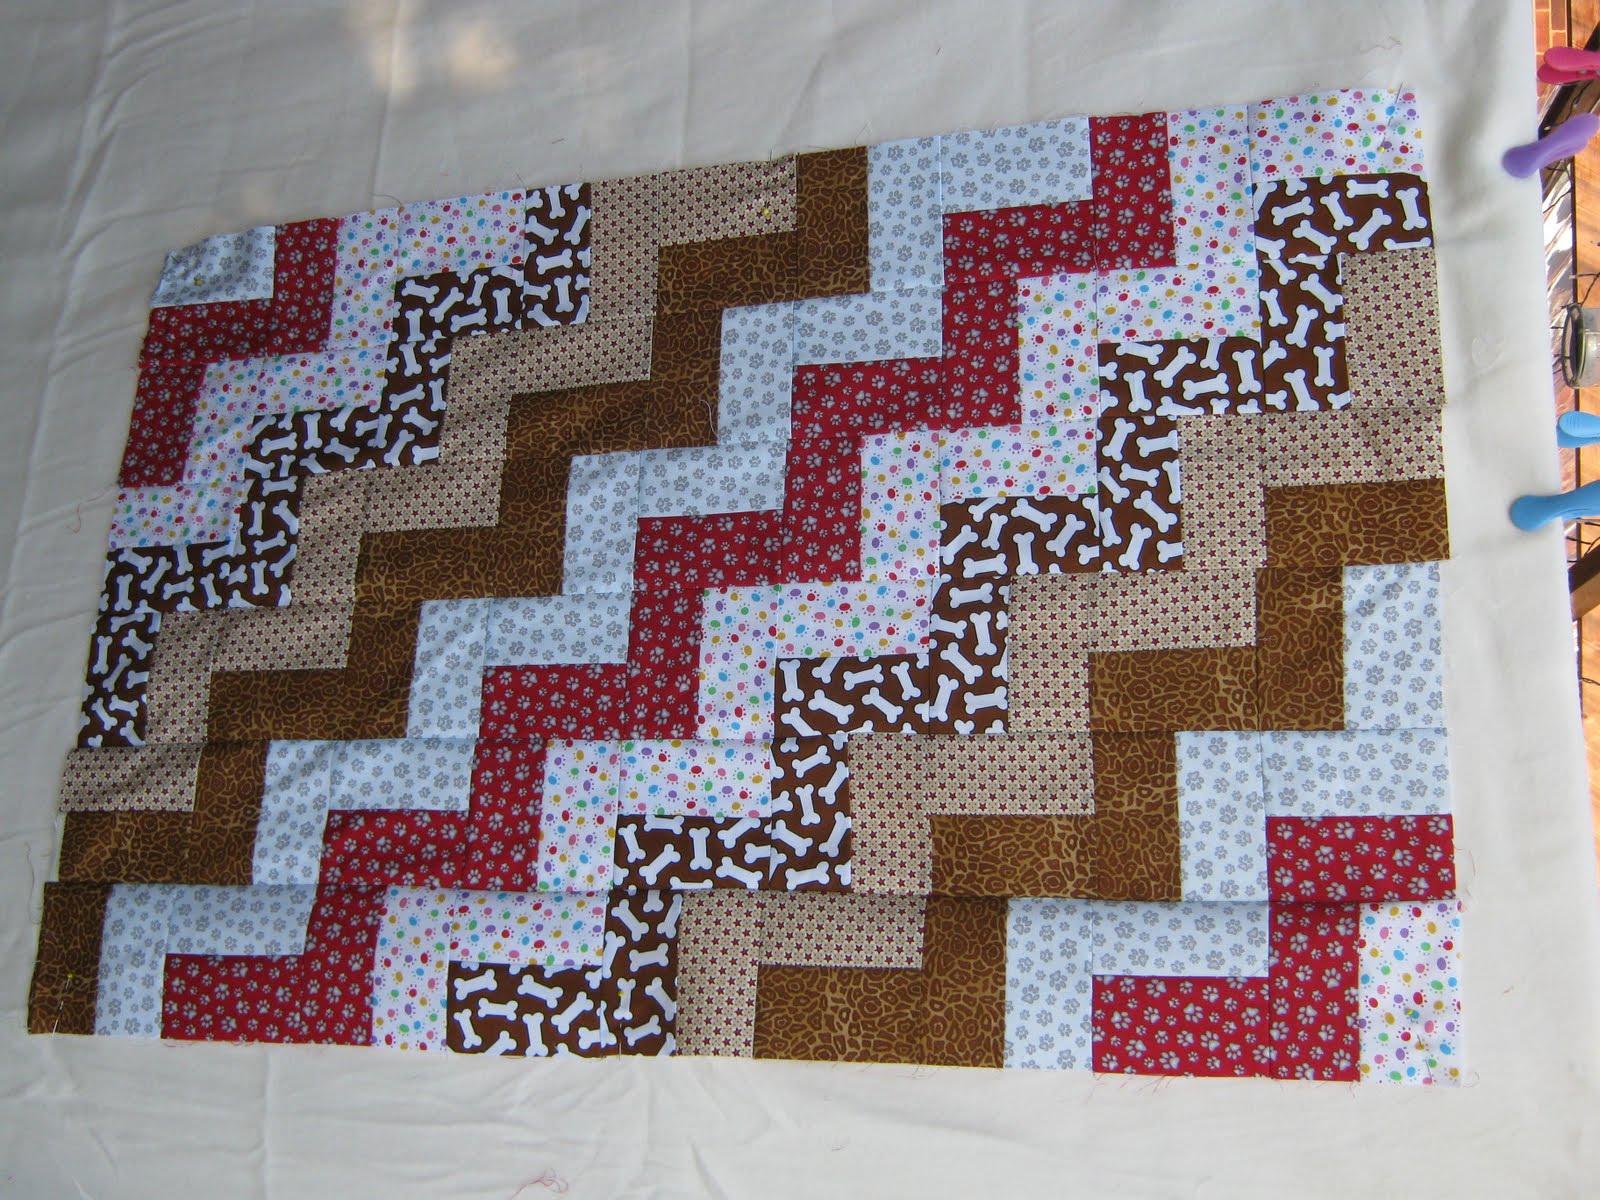
So I have my blocks in strips (in this case just 'bricks' of fabric joined into strips the same measurement as the width of the fleece)

I have already done the middle ones (numbered  16 to 21) and I am now joining the next two (15 and 22).  I have pinned them to their next door neighbours, and to the fleece below


Then I stitch through 15, 16 and the fleece, (and 22, 21 and the fleece). I press 15 and 22 open, and repeat with 14 and 23 etc.

I'm not a great fan of heavily quilted patchworks (unless its quilting in the negative spaces - Jen, you rock!) so I'm very happy with there being no visable quilting on the surface and there is no crawling around on the floor stretching, taping, pinning, or tacking the flimsey.

And I managed two and a half tops today!


Friday, 6 July 2012

Basting The Beast (with help from Bodger Brian)

We don't call husband Bodger Brian for nothing . . .

This is part of my work/sewing bench.  It is wider than this, but here you can see the depth, and the sewing machine is about the size of the small quilt you can see, which doesn't leave much space for the stitched fabric.

And The Beast (AKA The A to Z project) needs space - it's huge, heavy and not too flexible.
PLAN A -I decided I would like a Sew Ezi table - too long to wait .
PLAN B - I set up my ironing board in front of the bench - too much wobble
PLAN C - Brian found two unused folding stools from a  previous kitchen which included a breakfast bar, and a plank of wood which will become cupboard doors in a future kitchen . . .


And now I have my own sewing table extension :-)

(As this saved nearly two hundred pounds, I can spend that money on something else, right?)


Which is very handy when sewing something as big as the Beast


(OK, not strictly basting, but I'm using my QAYG method which does away with proper basting, and I liked the alteration :-)

Friday, 29 July 2011

Today ... and a while ago

When I started the texture blocks I was planning to use the Quilt As You Go method using Welsh Quilter's method (click here), so I made each one with the three layers (cotton, wadding, backing fabric) ready to sash them together.

Then after 8 blocks I changed my mind and made the rest without the backing fabric (I didn't really think it through did I?)

So now I have some which need backing, and others that will be really thick if I do back them (I am using curtain fabric to back them: it seemed like a good idea at the time!)

I have a cunning plan (which will be revealed if it works!)!

Today's achievement has attached the eight middle blocks (all the QAYG blocks) into two strips
The front sashing is stitched onto the front of one block as the same time as sashing is stitched onto the back.  This block is joined to the next block Go to Welsh Quilters post, she explains it much better than me!  Now I need to press the sashing, and then hand sew the backing sashings down on these blocks and then I can do the horizontal sashing.

Then I can see whether the cunning plan will work!!!

A while ago I made a baby quilt that I was sure I had posted about ... but I cant find the post, so I'll tell you about it now.

My little village (pop 800) and the neighbouring village (pop 3800) each have a church, but we share one vicar, and lots of church events are organised for both parishes.  There are a number of 'house groups' and I attend one in the other village on a Sunday night.  Our group is all mums, mostly of teenagers and students, but one mum, Phoebe, has two littlies (6 and 3 ish) and is expecting number 3.  She know she is having a girl, and she is going to be called Grace (beautiful name).   One session that Phoebe was unable to attend, I tentatively suggested a quilt from the rest of us.  It was tentative as I know some people don't respect hand made stuff, but luckily the others loved that idea (and two had been wondering how to ask me if I'd mind!!!)

Se here is Grace's quilt, with her name on the front and a label on the back.


and we are just waiting for Grace to arrive!

Friday, 29 April 2011

Pieced ... and a party

Here, at last, is last week's pieced top.  The fabric is Moda's Girl's Best Friend - yummy batiks.  

I did the pinwheels blocks, and joined them in strips.  Then I joined the strips to the fleece in my Quilt As You Go method - the one that probably has traditional quilters shaking their head sadly, but works great for me [click here for instructions].  It took about 45 minutes to go from 4 strips to a pieced top!  I did then decided to echo quilt each pinwheel block - except I then did one quilt line down the middle of the block instead of at the side.  With normal fabric I might have unpicked, but batik isn't too forgiving, so I did the echo quilting on each horizontal and each vertical - that might teach me to concentrate!

I have ordered some more of one of the pinks for a border then this will be ready!
Although we had a no-work day today for the Royal Wedding, I didn't get any sewing done.  The family didn't show much interest in watching the wedding, so I thought we'd have it on in the background - in the end I had a husband, two daughters, two boyfriends, and nephew and his daughter all watching the wedding, and drinking my tea!!!

After lunch we then moved out into the lane for a great Street Party.  Appx 120 people in our little road, eating, drinking, chatting - having a great time!
Hope you had a good Friday :-)

Tuesday, 14 September 2010

Lisa made a quilt


Lisa wants to take my old sewing machine to Uni with her - she is desperately worried about being bored so wants something to keep her busy. I showed some picture quilts a while ago that I have made and will post to her over the next few months for ideas, but as a friend of hers has just become a father, she wanted to make a quilt.

She was worried that doing it all herself would be too much, and that she would give up, so we found some skinny insert blocks that I had been playing with and she joined them together, first in three strips, then, (using the Slik and Quick method)she attached that to a fleece blanket We then created some 'piano key' strips from fabrics used in the skinny inserts and used that as a border, and finished with a plain pink border and the baby's name embroidered. She's gone off to present it to the family tonight - I hope they like it :-)


**Update** the baby's parents liked it, but Grandma *really* liked it - I think she had far more appreciation of the work that went into it. As for baby - she just slept, but Lisa did get a cuddle :-)

Thursday, 19 August 2010

Slik and Quick Quilt as you go (Tutorial)

I was making patchwork quilts for many years before it occurred to me to get a book or attend a lesson. Instead I looked at quilts and thought about how it was probably made, and set off to do the same thing.It was only when I started to attend lessons that I discovered that my way wasn't the same as the taught way! However, I still use my way in a lot of cases - and my Quilt as I go is a case in point.

I have made all my blocks and have stitched them together in rows, and checked they are all still correct, and have numbered them. Now I can Quilt as I go. For this tutorial, I am working on a quilt with 6 panels. An odd number of panels is slightly different (*).

Prepare the other layers of the quilt. If this is backing fabric and wadding (batting) put the backing fabric face down on the table, smooth out any creases and put the wadding on top. (you can use spray adhesive to hold these together, pins, safety pins, tags, or trust) If you are using fleece, put the fleece on the table nice side down, and smooth the fabric.

Find and mark the middle of the backing. Place a pin at the middles of the edges. Take your two middle strips (numbered 3 and 4 in my example), and place the lower numbered one (ie 3 in my case) 1/4 inch past the middle.

Pin the next strip (number 4 here) to it, along the centre of the backing, matching the seams.


Open out the new strip and double check that the pattern is correct. Stitch, making sure you use locking stitches at either end


Press open, and now add strip 2 to strip 3 and strip 5 to strip 4 in the same way, finishing by adding strip 1 at the beginning and strip 6 at the end. Press open


The following photo shows the back. You can see the stitch lines running from left to right - well that is the first half of your in-the-ditch quilting done. All you now need to do is whizz along the other seams (perpendicular if we are being pedantic!) and the whole piece has been quilted in the ditch and you can now get on with adding your borders :-)

From mini jelly roll to this took me a morning - so quick and so satisfying

Enjoy!!!
(* for an odd number of strips, position the middle one down the middle of the backing, and pin the strip immediately before it and immediately after in into place. Stitch and continue as above)