Thursday, 10 April 2014

Happy Holiday Sewing

It's lovely to be able to spend the day with a friend who also loves sewing!   Usually I have to travel to Jackie in Ireland for this, but Valerie lives just a few miles away, and as we both work at school, we are both on holiday this week! Yippee!

You met Valerie before Christmas when she wanted to make a protective jacket for her sword fighting training, but yesterday she decided it was time to make herself a quilt.

I took her to Helen's: Helen is a lovely lady who has a patchwork shop and workroom in a logcabin in the garden at her home, and is full of ideas and suggestions. We found some lovely jewel coloured dragonflies, and paired them with some green and dark pink solid.

Although Valerie is new to patchworking she knows how to drive a sewing machine, so we moved on a bit from her initial plan of just big squares, and trialed a one patch and four patch idea

it looked good, so we arranged the blocks on the horizontal design wall (ok, my bed)
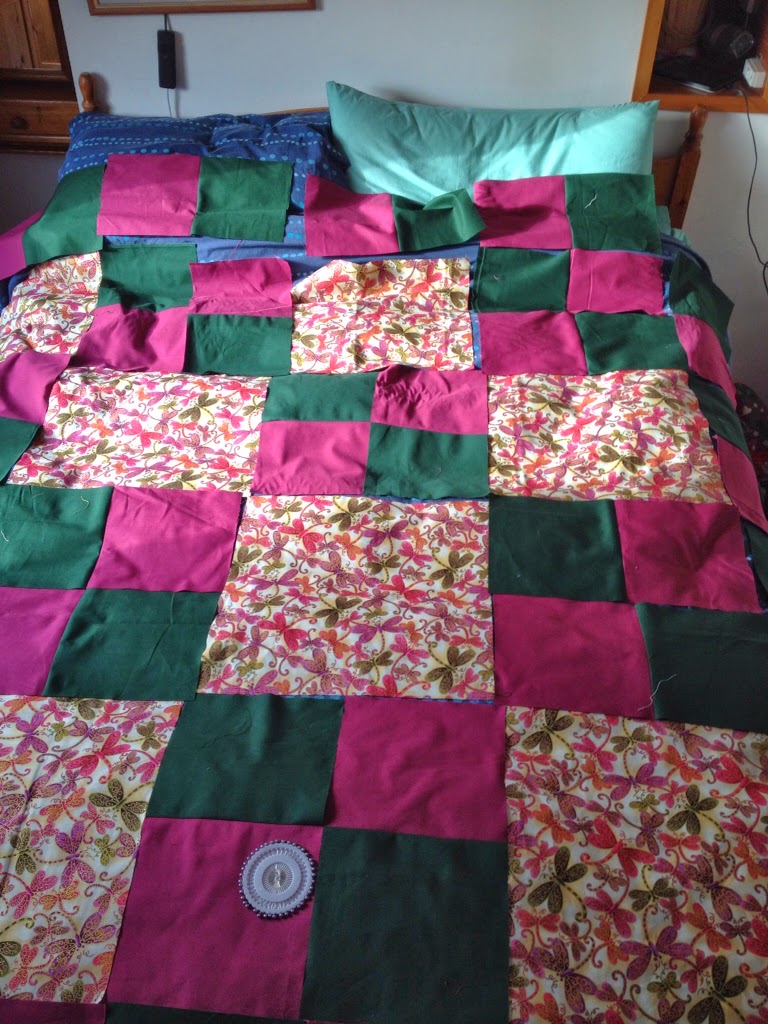
And then arranged a border of pink / green squares. We liked the arrangement, but wondered if the pink and purple squares were maybe a bit bland?

We have, of course, the technology (with the embroidery machine) to decorate the solid blocks, so Valerie picked up pen and paper and just knocked up a couple of awesome dragonflies and a flower for me to change from a sketch on paper to an embroidery on fabric.


I'm now off to play with the embroidery design software

Wednesday, 9 April 2014

Future Fun With Fabric (tissue pouch)

This requested project, a pouch for tissues, is fairly easy to work out just from the photo:

But if you want measurements: cut two squares 3½"x3½", and three rectanles 3½" x 5¼".  Fold the two squares in half, and two of the rectangles in half lengthwise.  Arrange these four pieces onto the right side of the remaining rectangle and stitch around the edges.  Then turn right way out.

Variations: 
  • smaller for business cards? 
  • or for tampons / panty liners
  • all squares for a mug rug?  
  • all circles for a wine coaster (slip the base of the glass inside for a coaster that stays with the glass (make lots in different fabrics to identfy each person's wine glass)?
  • Use bridesmaid fabric to make these for the mothers at a wedding

(Idea inspired by this blogger, but I went a bit smaller as I found hers a bit big for the issue packs sold here)

Tuesday, 8 April 2014

Brilliant Bunnies

I taught at Chertsey Museum today - bunnies from a square of fleece! The kids got the hang of it really quickly, and made *loads* of bunnies - all with their own unique look and personality!!!!


All ready for Easter!!!!


Monday, 7 April 2014

Zooming Zig Zag

I sometimes wonder if using alliteration for my post titles isn't getting harder and harder! Anyway, the first zigzag quilt is ready to have the binding hand stitched on, so the suggestion that I've zoomed through it seems quite acceptable!

By the end of yesterday the Carnation blocks had been pieced into strips and were starting to be attached to a fleece blanket, and by mid afternoon today it looked like this

There were a few blocks left over so I added some extra to the sides, but then there wasn't quite enough kona carnation for the binding, so one edge is scrappy binding to match the side additions: this evening it looks like this - and is in the to-be-finished pile


Next I *could* start on joining the cornflower blocks ... I'll see what I'm tempted with tomorrow!


Sunday, 6 April 2014

Sunday Sewing

Today I've been mostly doing the boring bit of  patchworking: monotonous sewing of one block to another - for hours on end!

But the two zigzag quilts are starting to come together.

More exciting is this finished cushion:
which I've made for M's younger sister, and this top that Jackie and I started on my last visit, and she's now assembled:

Saturday, 5 April 2014

Pinwheels and Plum

A lovely surprise was waiting when I got home a few days ago - the lovely Plum has sent me some selvedge edges - they look like the edges to her seriously yummy purple quilt.  Thank you Plum, have a great Easter :-)


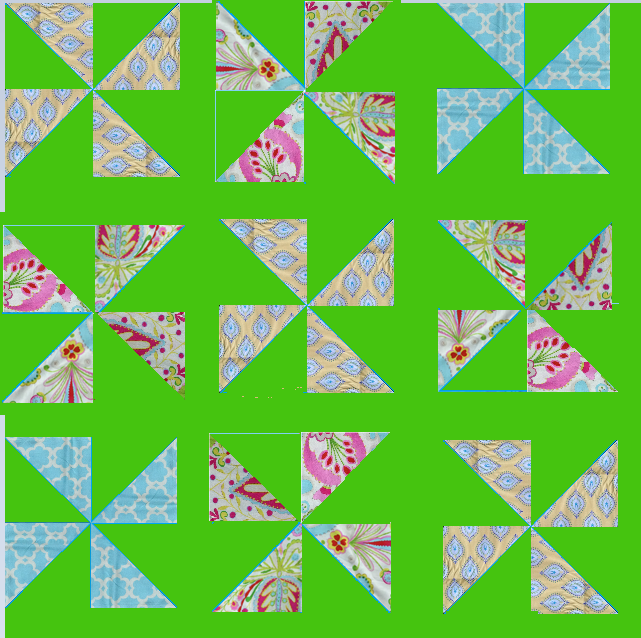
Thanks for all the suggestions as to what to do with Tara's fabrics and the proposed pinwheel quilt.  I played around with the fabric and the different suggestions, but rather than using stencils, (thanks Sue) I did some very basic work with the paint program, and came up with these ideas

Using the flowery fabric as blocks, and matching a colour and using it as a solid for the pinwheels and for sashing, and a small section would look like this


Or using the flowers for the pinwheels and the geometric fabrics as the blocks.  I have shown the same piece of fabric for each sail of the pinwheel, but in reality they wont be the same, but I can select 'best fit' when I come to assemble them, so a small section could look like this


Or all pinwheels with added solid.  Here I have shown a small section of the flowery pinwheels with different sections of the fabric

Hadley asked about quantity: there is a yard each of the blue with cream, and of the flowery, with about a yard and a half of the yellow with blue.

Tara: any of these could instead be set on point - at 45 degrees, to have a very different look: the second green one becomes this

OK, my eyes are square, and I'm done for the evening - suggestions please on a post card!

Friday, 4 April 2014

Made for M

The Sorbet Squares quilt was finished at lunch time at school and presented to M at the end of the school day as she heads off for her first round of chemo

Is it a hug

 Or a super hero cape?

Thinking of you M xx

Thursday, 3 April 2014

Making for M

You may recall that a while ago I made a quilt for a little boy, D, to take to his chemo appointments.  His class mates and his teachers all signed a block each and I assembled it:

Astonishingly, a neighbour of his, of a similar age: M, is about to undergo chemo too.  Her chemo is coming up much quicker than his did, so I didn't have time to get blocks signed before I could put them together . . . but I did have a very girly quilt close to being finished that I thought would be perfect for little miss M, and it could be signed after it had been constructed

So I dug out the Sorbet Squares top, and quilted it, with chevrons, organically following the colours
 

and I put a few daisies onto it,


and it's now gone to be signed by all her friends, and I've just got to stitch the binding to the back, and then it can go, with our love, to hospital with her


Wednesday, 2 April 2014

Future Fun With Fabric (jewellary pouch)

One of the ladies at Chertsey brought in a little jewellery pouch that she wanted to make.  I've had a go based on what I remember.

I started with two dinner plate sized circles, and two side plate sized circles.  I sewed each pair together (RST).

I cut a small slit in the middle of one side of each, and turned through, then I laid the smaller one on the outside of the larger one, centred it and draw round the smaller one (I used a frixon pen)

I stitched a circle of bias binding outside the drawn line (folded in the ends, left an opening)

and threaded ribbon through the binding casing

I flipped it over, and placed the smaller circle in the centre of the larger one and stitched it down with 8 lines across the diameter (making sure I started inside the casing, I don't want to sew over that)  I also stitched a circle about half way between the edge and the centre

I pulled the drawstring and I got a little pouch with eight separate sections for rings or earrings

It doesn't look great in the photos, and the bias binding was just scrap; so I next used coordinating colours rather than such a contrasting ones: the ladies are happy, and looking forward to making one

For jewellery (dire photo - its actually red!  Sorry Katy I must re-read your instructions for taking decent photos!)

Or it could be a small sewing kit


Tuesday, 1 April 2014

Bennett's Bunnies & Baby's Finish

We have an estate agent in the village, B S Bennett's, who do some fabulous themed window displays.  Well this Easter they have turned it over to the community, and invited us to submit Easter decorations

About the same time as they issued this invitation I was looking at Urban Thread's Giving Bunny project, and was reminded that Plum and her girls had made some [see here] and they really enjoyed them, so I got to thinking about making these for the kids who come to the Easter Kids' Craft Church session.

I adapted the design slightly to allow me to use just one colour thread rather than keep changing - this way I can do two in five minutes: a great help when I'm doing 30+!!!

So here are the Bennett Bunnies enjoying a bit of Windsor sunshine before being delivered to the shop window


There are another couple of dozen already stitched, with more being stitched as I write this: ready for the kids to stuff and sew closed at Crafty Church - and we shall discuss the Urban Thread's idea of leaving these in places for someone else to find

I have also finished Baby Mark's pillow and quilt, and they are ready for delivering, with all the bibs and vests etc, to his mum