These chunky button necklaces take about 120 buttons - make sure you have plenty before you start, or maybe make a bracelet first.

To start you need 2 x 2m lengths of plastic elastic cord. (I have used red cord simply so the photos are clearer, but I usually use this stretchy elastic cord which I get from Baker Ross, £3 for 30m. You can use sewing elastic, but the ends keep splaying and it gets difficult to poke it through the buttons. )

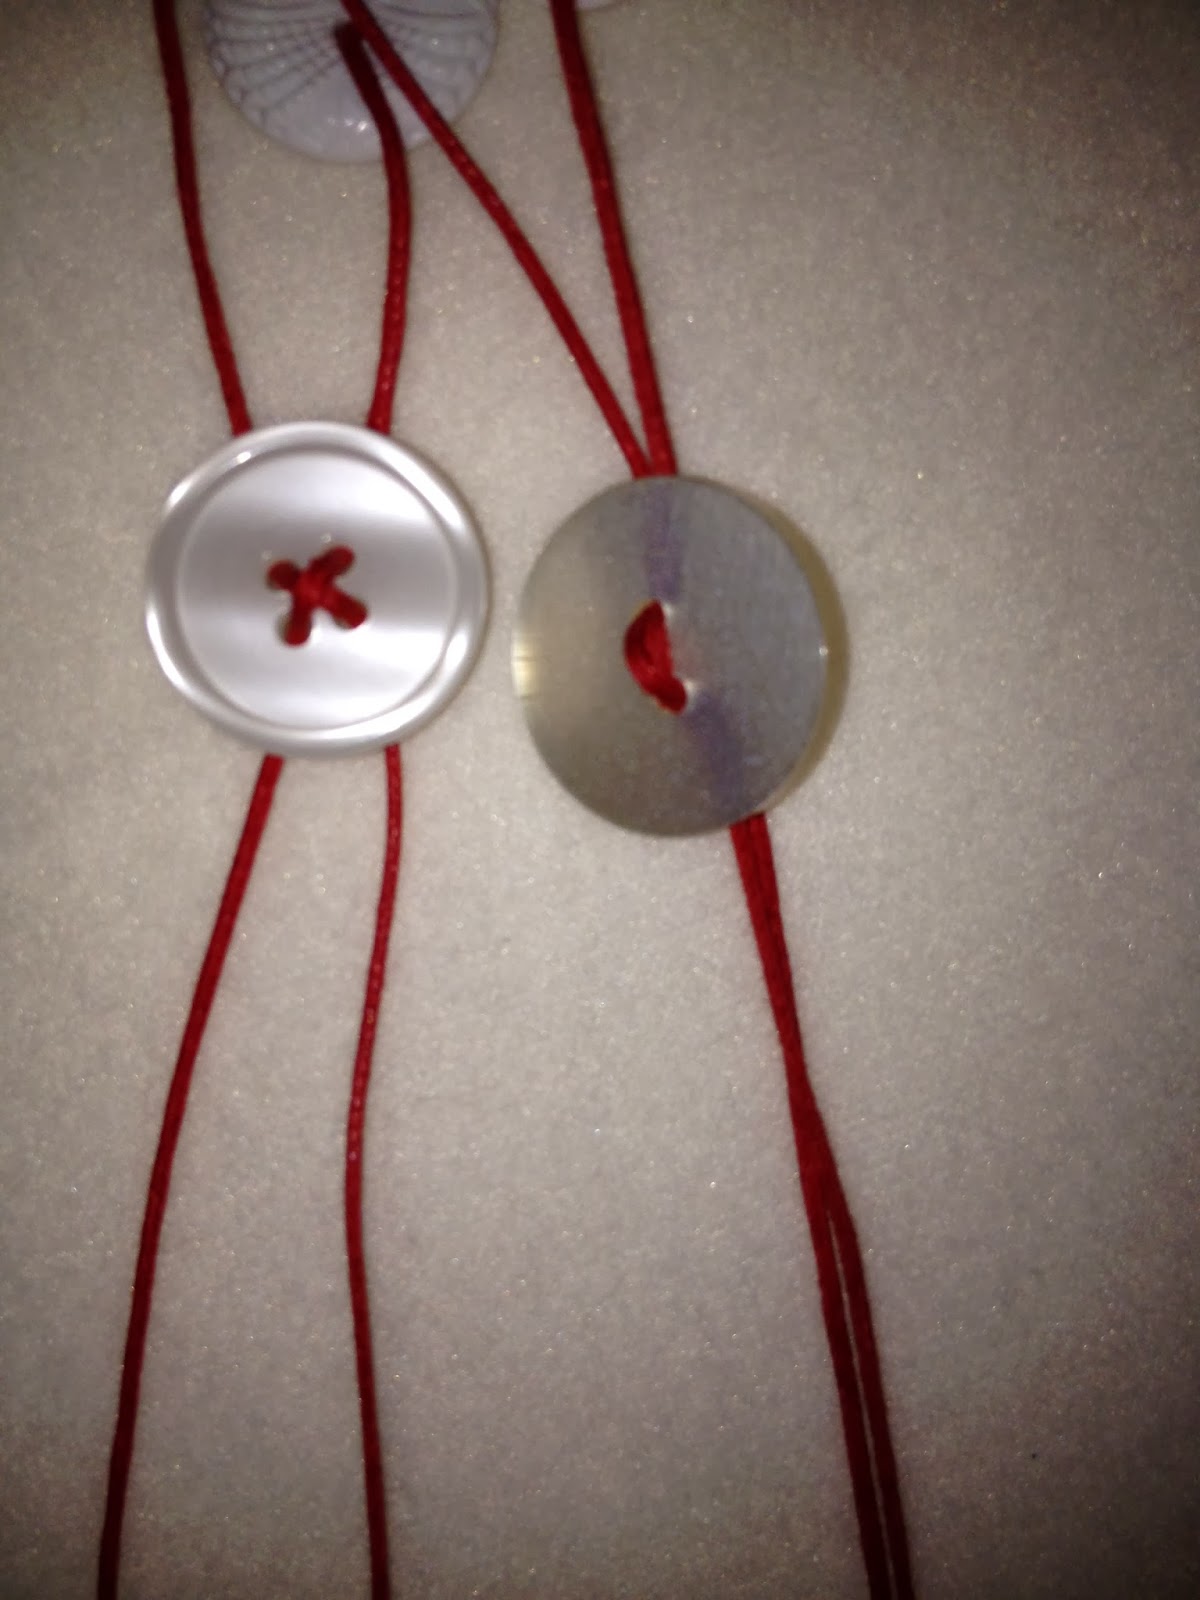
Holding the two lengths together, find the middle and tie a knot leaving a small button sized loop.

Take 4 buttons and thread one onto each length of cord, (in and out, through both holes so they lay along the cord). Push them up to the knot (this is a single [a single thread for each button] stage)

Next take any two cords, and use them both to attach another button, and the remaining two cords to attach a 6th. Push them as far up to the others as you can. This is a twin stage (two cords to each button)
Repeat another single stage followed by another twin stage, and that's pretty much all you do until you have run out of patience or buttons! You will always need to use a different two cords to last time, or you will get 'holes' in the necklace
When you get to the end, tie a knot in all 4 cords, then thread a final button on, and tie another knot outside the button

Things to think about:
- The smaller the gap between each button and the next, the chunkier it will finish.
- If you want a 'middle' like my turquoise one has, you can use two bigger buttons back to back.: Use a necklace they you know is the right length as a measure to know when you have reached the middle.
- The stretchy cord doesn't really like to knot: give it a really good tug to stop in unknotting. A *really* good tug - it
won'tshouldn't break - use a variety of button sizes as you go so you don't have just small or just big left at the end
- An alternative which gives a slightly less chunky finish is to add three buttons at each stage: one twin and two singles - that is two cords into one button, and the other two cords into a button each, then take one of the previous twins, and a previous single and make them into the new twins. Keep changing, to avoid holes.
Thank you for that, when I made one I used ribbon but had to make it really long so as it would fit over my big head! The cord is a much better idea- now to find where I can get it :-)
ReplyDeleteI don't think that I have enough buttons for this Benta, I shall have to raid my mother's button tin when she is not looking :)
ReplyDeleteVery clear tutorial - thanks Benta!
ReplyDeleteThanks for this tutorial Benta. I have a big bag of black and white buttons looking for the right project, and this could be it.
ReplyDeletePined for later, thank you xxx
ReplyDelete