I am not a fan of traditional pinwheel blocks
(using half square triagles, where you take two squares of fabric, stitching two parallel lines from one corner to the opposite and then cutting down the middle). Cant explain, just don't like it, so when I saw this method it appealed to me
This is an amalgamation of a number of pinwheel tutorials that I have seen, and results in a quick, easy and accurate way of making pinwheel blocks from strips of fabric. (there is another way using squares, but that is for another day)
I used strips from a jelly roll, so my strips are 2.5 inches wide. I stitched two strips together along BOTH long edges
I then cut the strip into 2.5 inch squares [note, if you are layering blocks to cut a few at a time they need to all be the same (ie dark fabric on the bottom, otherwise you get some as mirror images ... guess how I know!)
Now cut each square into two triangles, corner to corner (cut all blocks the same direction)
The triangle will have one long seam, and one diddy little seam just a few stitches long (you would see this if the photo wasn't out of focus!). Slip your finger between the two layers and this will easily open
Press all the newly formed 'twin' triangles open, seam to the dark side
Now join these twin triangles in pairs to form quad triangles. Press seam to the dark side
And then join pairs of quad triangles together to form a pinwheel block.
But now we have a problem - we cant press to the dark side as there are two dark sides ... top left and bottom right, on opposite sides of the seam. Can you see the first two diagonal seams have been pressed clockwise, and we'd like to treat the centre seam as TWO seams and press each one clockwise
So ... we are going to do some 'spinning'!
Remember the seam that joined the twins to make quads? It is now the seam that is perpendicular to the centre seam. Confused? OK, photo time.
The centre seam is shown black on this next photo, and the first seam is red. We aren't interested in either of these. The green seam is the one we want. We need to unpick the top few stitches - from the edge to the centre line
Once we have done this, we can push / encourage / persuade each half of the final seam to spin, and lay flat clockwise (showing this cute little pinwheel in the centre)
... and Bob's your uncle
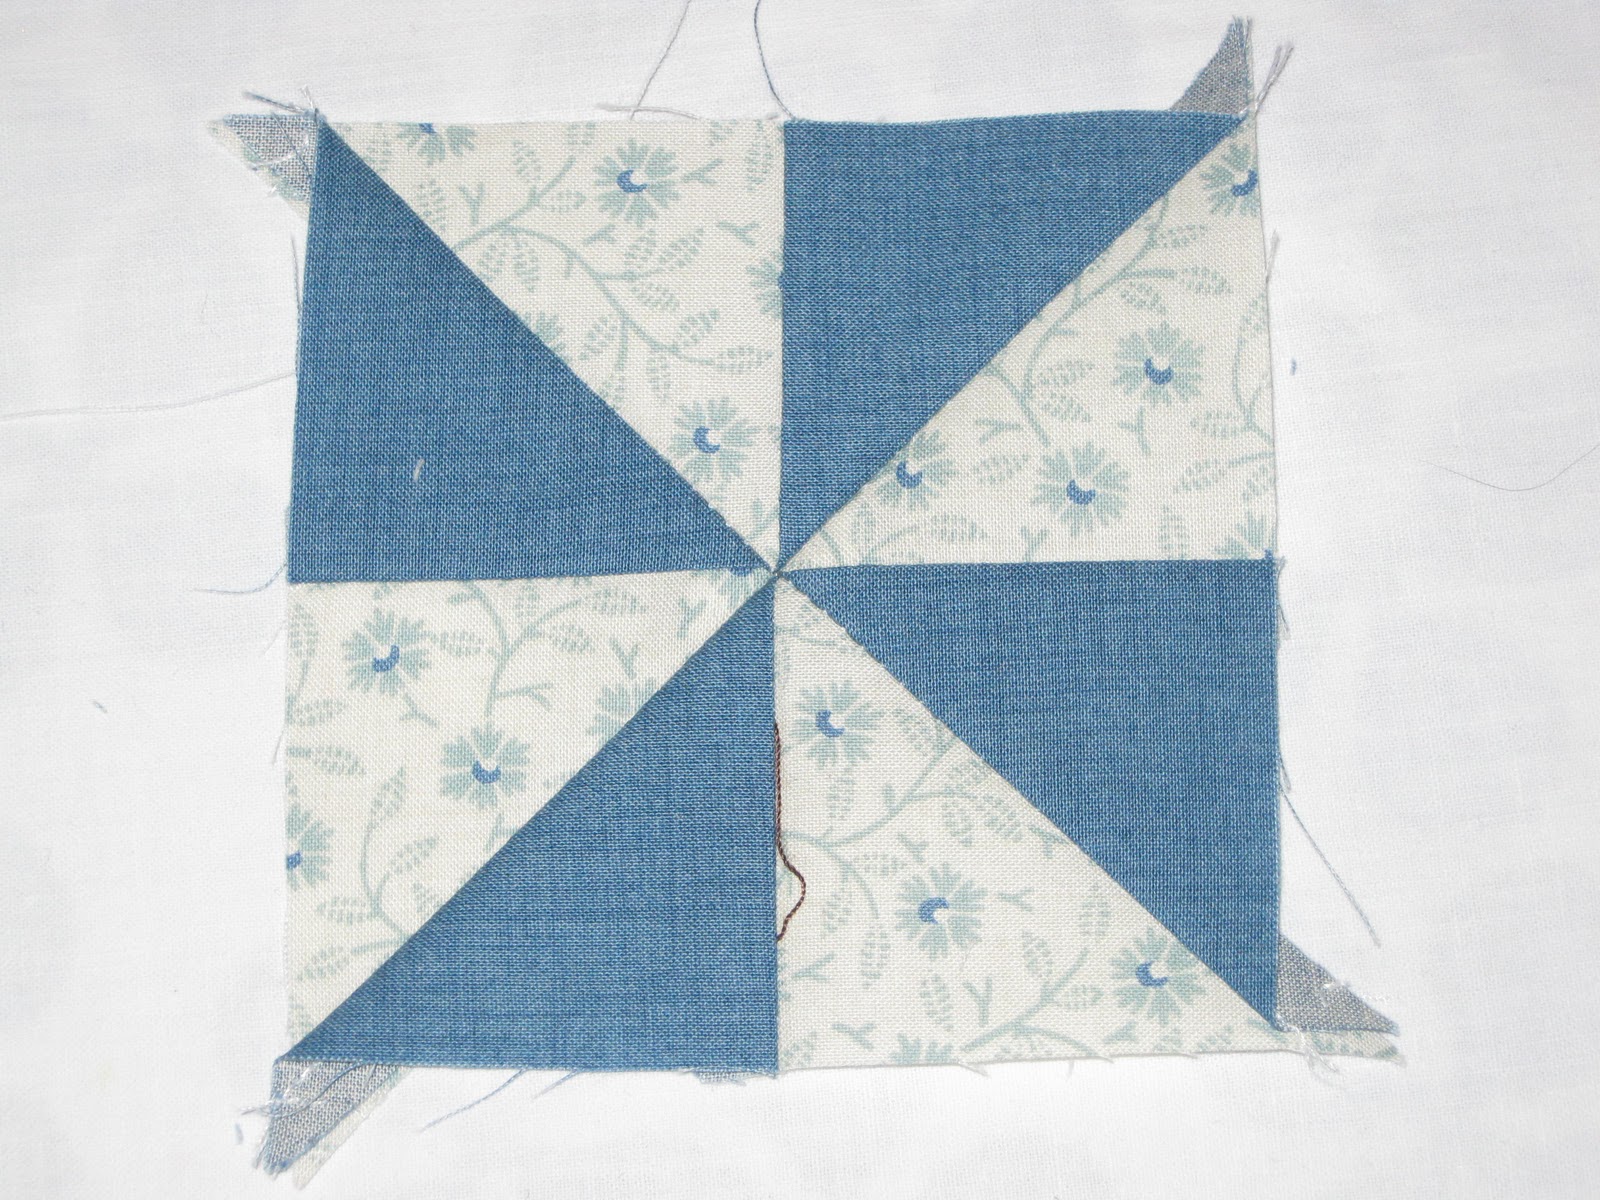
One pretty close to perfect Pinwheel block :-)


Great tute Benta! I must try that.
ReplyDeleteSeems very complicated to me, but I'd love to see the real thing when I see you on Thursday! Love xx
ReplyDeleteBenta, this is a very clever technique. I don't think I had seen it before. I will try to remember it.
ReplyDeleteGreat tutorial, Benta. Will give it a go as this method is new to me - old as I am!!!
ReplyDeleteDoris