
Some years ago she found The Bag and has used it ever since - and it's starting to look a bit sad.


They have tried all sorts of 'almost the same' designs, but with limited success . . . could I possibly try and make one?
I had photos, and a sheet of measurements

Lynn had thought about making one herself but didn't knw where to start, so I thought I'd include directions here so she can have a go at making one if she wants to
For an unlined bag you'll need:
- 2 bag pieces each 11 x 10 inches (if using directional fabric orientate these portrait)
- 2 pockets each 5 x 7.5"
- 2 straps each 30 x 5* inches (makes 1.25" wide straps)
- I usually use the fold-in-quarters method. I cant find any instructions, but this is close (thank you Liz). Roughly - iron in half, fold raw edges in to the middle line, press them in, fold back in half, stitch along both long sides.
- OR - If that would be too bulky, or you don't have enough fabric, or you cant press the fabric, cut fabric to 2.5" and use this method (thank you Liz)
- OR - If you cant be bothered to make the straps, buy 60 inches of webbing that suits your project and use that!
- Fold one short side over by about 1/2 inch, fold again, and top stitch.
Measure up 2" from the bottom of one bag piece, and pin a pocket, right sides together, hemmed edge hanging below the bag, on the centre of this line. Stitch with 1/4 inch seam

Flip pocket up so it's now in the right place. Repeat with second side. Press
Take one strap, and starting at bottom of bag, pin it so it overlaps the pocket edge along it's middle all the way to the top of the bag

Repeat with the second bag piece and the second strap. Once you've done both, line them up bottom to bottom so you can check the strap ends are aligned. Not essential, but annoying if they don't!

Stitch each strap starting at the bottom, up to 1.5" from the top, across, and down the other side. I found it easiest if I pined or clipped a measured piece of paper at the top so I knew when to turn

Once all 4 strap pieces have been stitched they also have completed the pockets

Placethe two units right sides together and pin the sides and the bottoms together.
* * * READ INSTRUCTIONS AND LOOK AT NEXT TWO PHOTOS BEFORE STARTING THIS NEXT BIT! * * *
In order to box the bottom of the bag we are using this method: Cut a 1.5 square from each bottom corner: Stitch the side and bottom seams, locking the stitch at each start and stop.
NOTE: you are only stitching the sides and the bottom, where you can see I've pinned - NOT around the cut out bit

Your bottom should now look like this (but maybe a bit neater!!!!)

Now manipulate the fabric so the two seam ends meet, and the two cut corners are pulled away from each other (annoyingly my photo of this stage is worse than my usual photos, sorry but the link shows it well)

Turn right sides out, fold top edge over 3/8 inch ish, fold again, pin and stitch to hem it
Admire!
My first version was made from a pack of two tea towels from Poundland - so it cost £1 in fabric!

The second version is actually lined and has internal pockets as well as external ones. It used 24 inches / 60 cm of 42" wide fabric.
Ann also mentioned a wipeable version. The previous two are machine machine washable, but I thought I'd have a go with vinyl (thank goodness for the non-stick machine foot) This was unlined (I couldn't cope with the thought of turning through a small opening), and took 30 x 20 inches fabric.
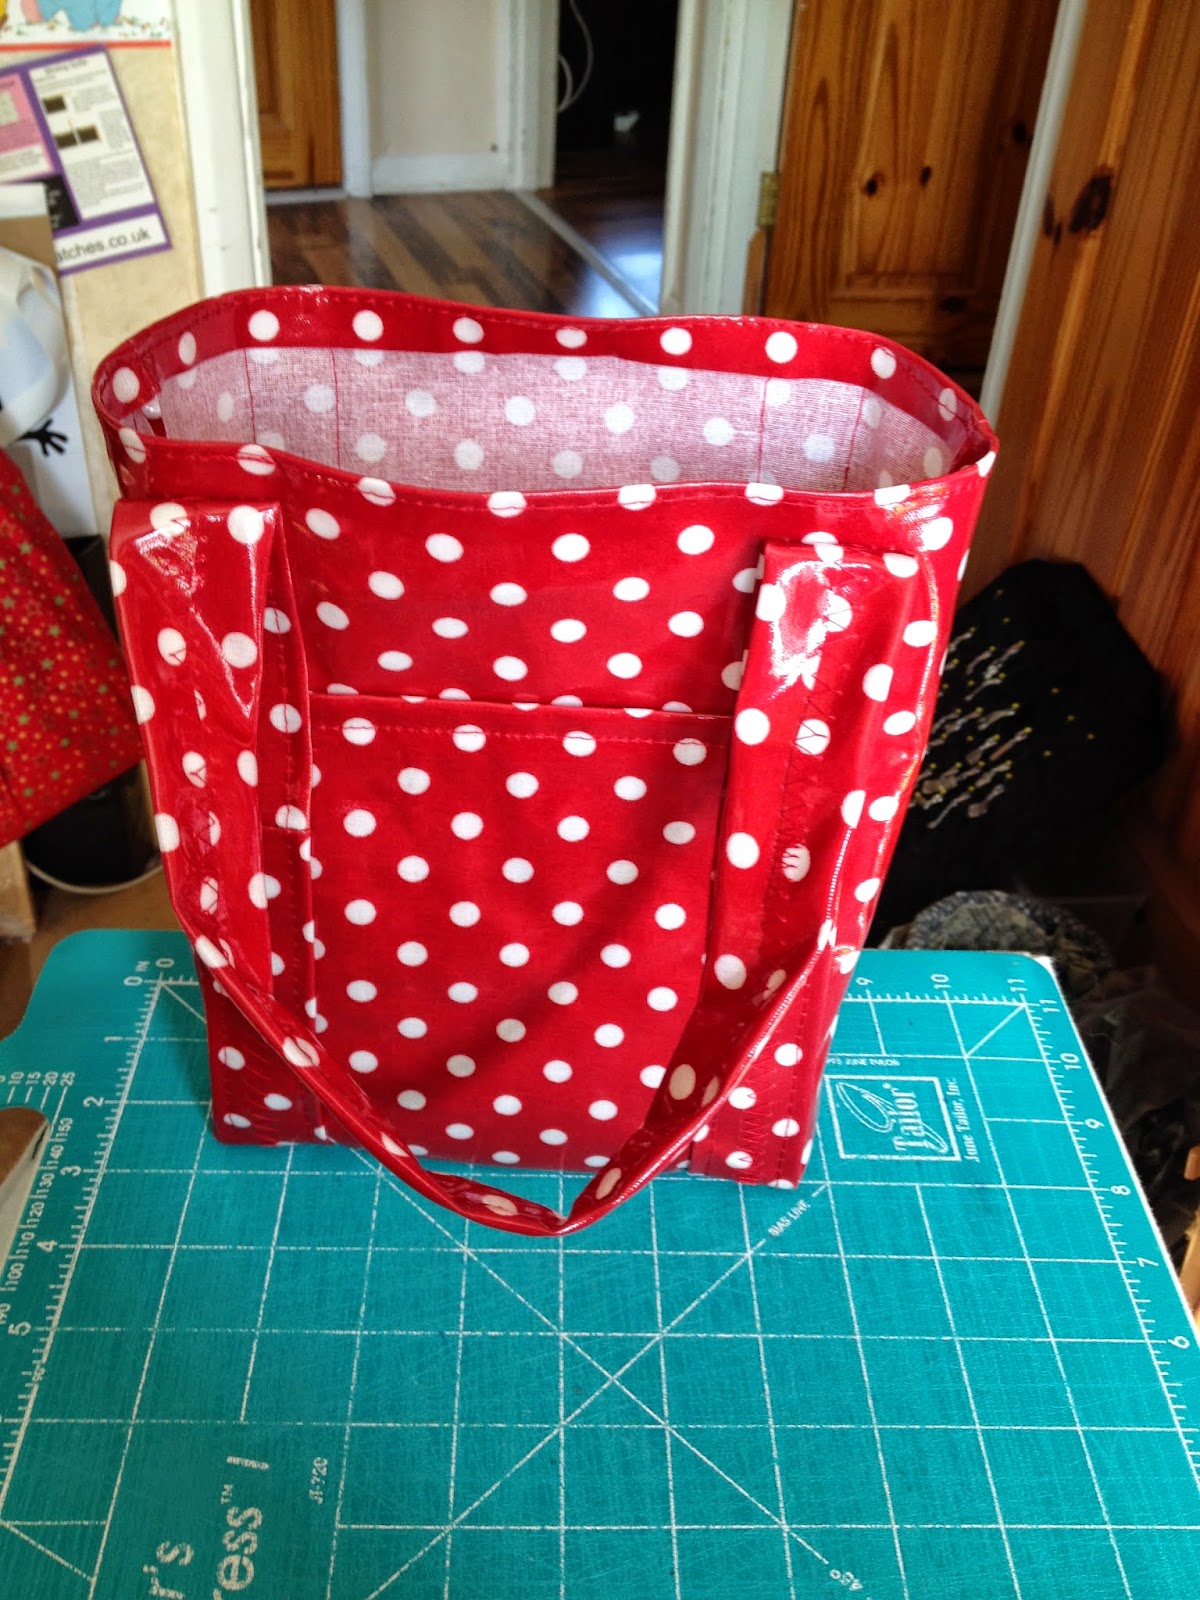
I used slightly sturdier fabric than usual patchwork fabric, which resulted in lovely sturdy bags. The pocket position reinforces the base and they keep their shape and stand up really well. I think they'd make a good project bag or lunch bag too. It look me 3 hours to make two, and each one uses about £8 of fabric
Hope Ann likes them!
Well they are fab! I like that bottom boxing bit too. I have some canvas somewhere.........
ReplyDeleteThey are super cute and sufre she will overjoyed.Thanks for the tutorial!
ReplyDeleteSewing in order to make something that is exactly right is such a kind and wonderful thing to do! These bags look great, Benta. You are a clever thing!
ReplyDeleteI will have to try this. I followed along as I read and it looked to be in order. Useful making - love it.
ReplyDeleteLovely bags, was the vinyl one difficult?
ReplyDeleteGreat bags and a brilliant tute :)
ReplyDeletethanks for a great tutorial, wondered why I had trouble with vinyl so I need a special foot. I do like bags that have the handles running from the bottom like this
ReplyDeleteGreat tutorial Benta.On my list to try out!
ReplyDeleteGreat bags - I'm sure they'll be loved!
ReplyDelete